
Getting Started
There are a number of things that must be in your school’s account before you can start using the Finance Module. They are:
- Numberings – this tells the system what type of documents you wish to create and the numbering format for them.
- Cash Box – you will need to create a cash box(es) to receive payments of this type.
- User Details – the details about your school that will appear on your financial documents.
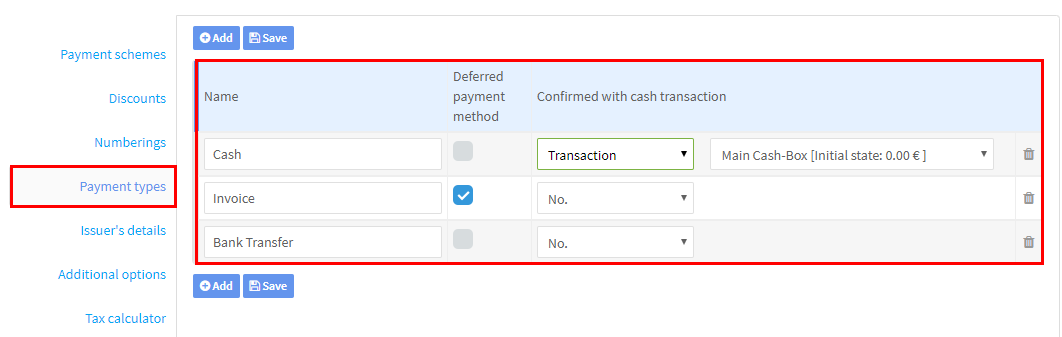
- Payment Types – when creating transactions you will need to tell the system what type: cash, invoice, deferred it is.
Two other items can be added but are not essential:
- Payment Schemes – if your students can pay by instalments you can create these and add them to the students automatically when they join a course.
- Discounts – if your students are offered discounts to standard prices you will need to create them first.
Adding Payments
Before you can add a payment the student or company must have a debt. Other tutorials show how to add a debt:
- Hourly
- All
- Company
For the purposes of showing how the different payment types work and what happens when you add a payment we will use these three basic types:
 When you want to add a Payment to a student or company you will need to the Payments Card and click Transaction – Add Payment
After you have done this a form for you to add the transaction will appear:
- Select the form of payment
- Because we selected a cash transaction which is connected to a cash register the default will appear here although we can choose a different one.
- Select what the payment is for.
- You may need to choose from a drop-down.
- Add a payment description. You can see it appear in 1. below.
- The amount scheduled by the system to be paid appears but you can change this.
- You can use this to calculate how much remains to be paid after a partial payment
- Click Save & Close.

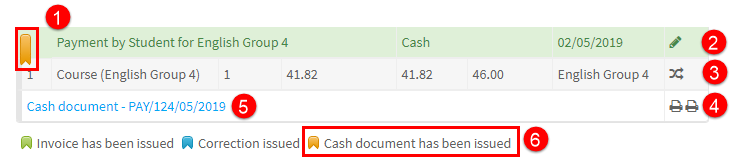
Now that we have added a payment at the bottom of the Payment Card we can see the following:
- The payment description added in 5 above.
- Edit the payment details.
- Transfer the payment to another of the student’s courses
- Print out one or two copies of the receipt.
- The receipt number. If you click on this it will take you to Cash Transactions – see below.
- Showing that a cash document has been created for this payment.
Other Effects
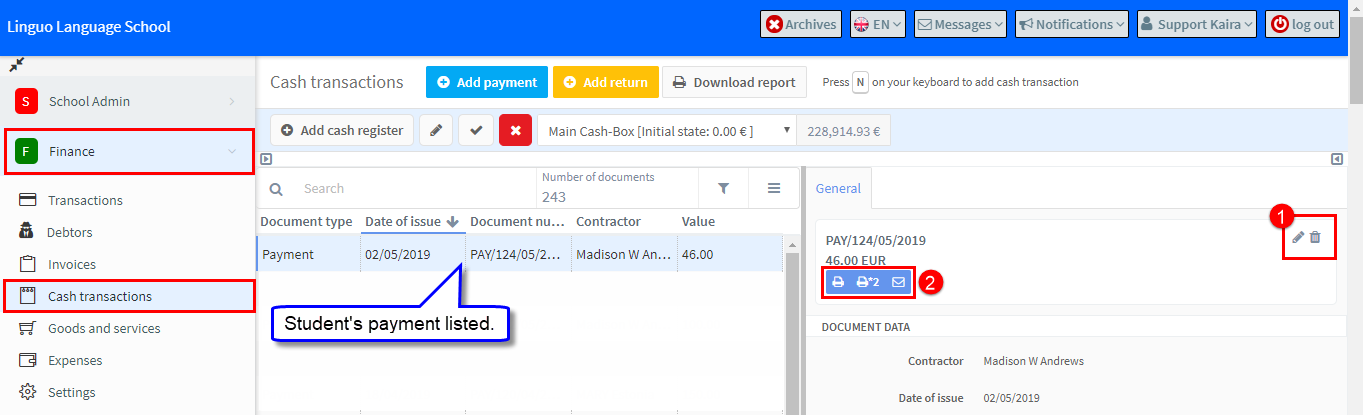
The cash payment which we made above is recorded elsewhere in the Finance Module
If we go to Finance – Cash Transactions we can see the student’s payment:
- Edit or remove the cash payment.
- Print out a copy of the cash receipt or send a PDF via email.
If we go to Finance – Transactions we can see the student’s payment:
- Payment description that was added.
- Edit or remove the cash payment.
- We can also create an invoice for the payment if required.
