This is the most advanced calendar in SchoolMate and can be used as a central point to administer all the teaching and scheduling in your school.
Go to School Admin – Calendar 3.
First, we will look at the top part of the calendar:
- Check availability. This allows you to search for available teachers and room. It works the same way as the “Check availability” card in the Classes Generator.
- Add Schedule. This allows you to add holidays to the system. It works in the same way as the “Schedule” on the Main Page.
- Here you can choose what type of item you want the calendar based on. In the example below it is based on rooms and you can see the names of the classrooms along the top. The other types of items are: teachers, groups and default (which shows everything together). The type of item, in the example below “Room” – can be combined with another items colour – in the case below teachers. So, the calendar below is showing the classrooms and displaying the colour of the teacher teaching that lesson. Teachers, languages, rooms and classes can all have colours attached to them when you create them. This link shows you how to select a teacher’s colour as an example.
- The heading show the item that the calendar is based on.
- Print out the calendar as a screenshot or export to Excel.
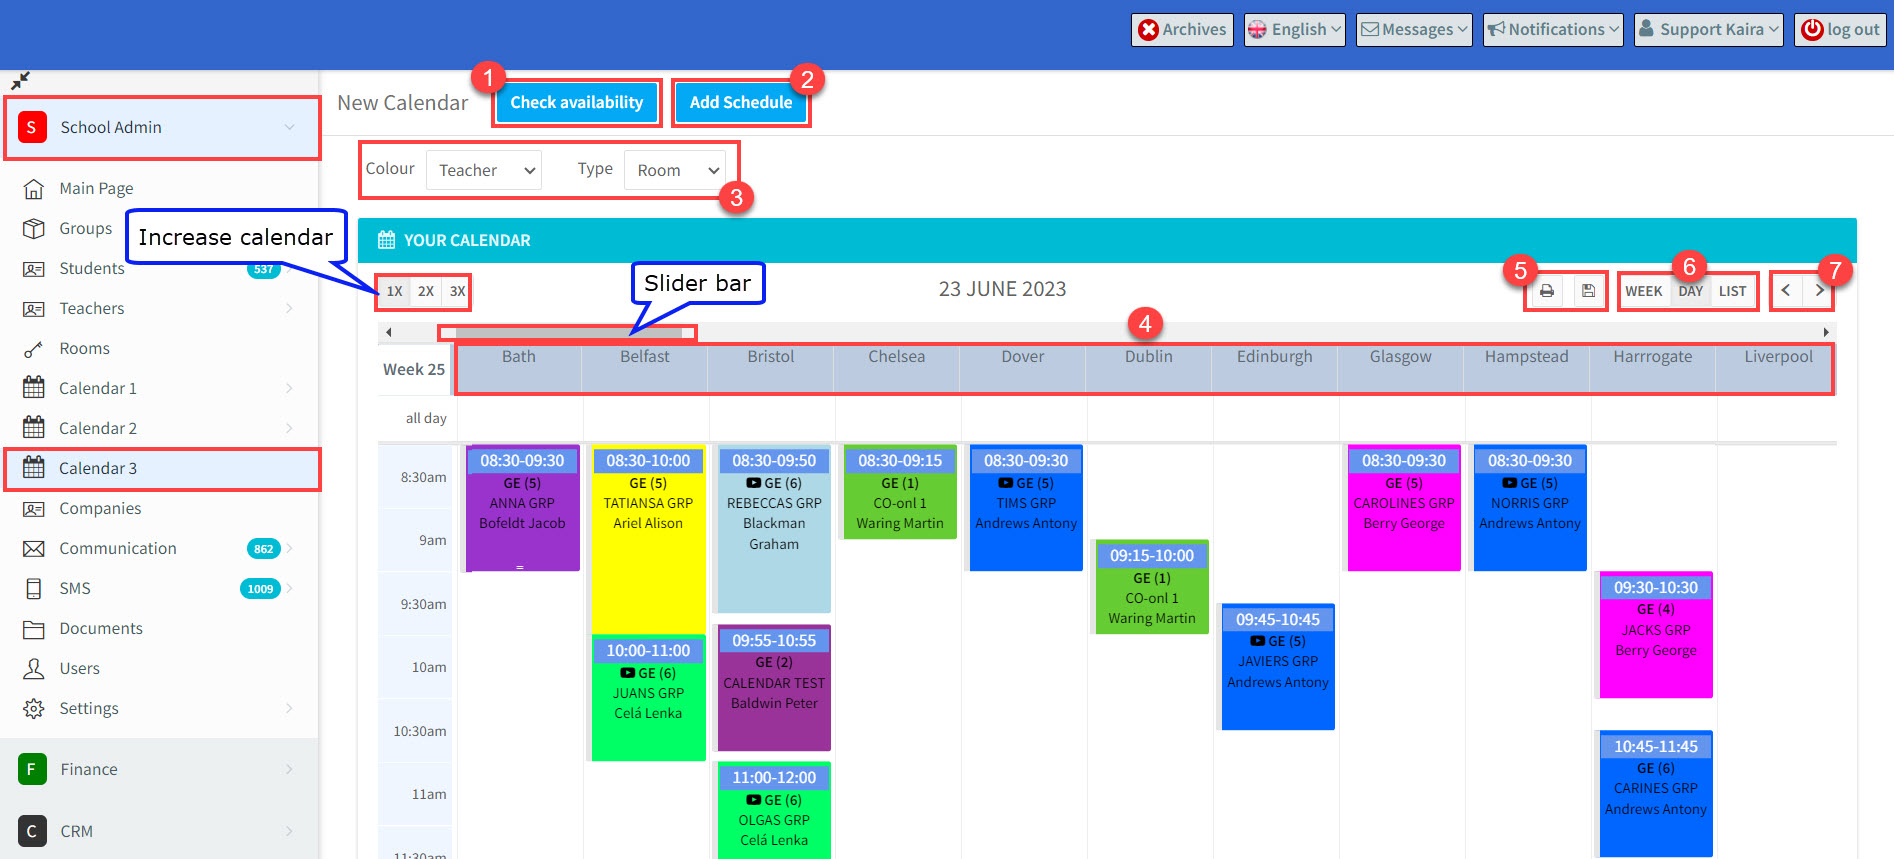
. 6. Here you can select the time period the calendar is based on: week or day. If you want to see a monthly view, you need to change the “Type” to “Default”

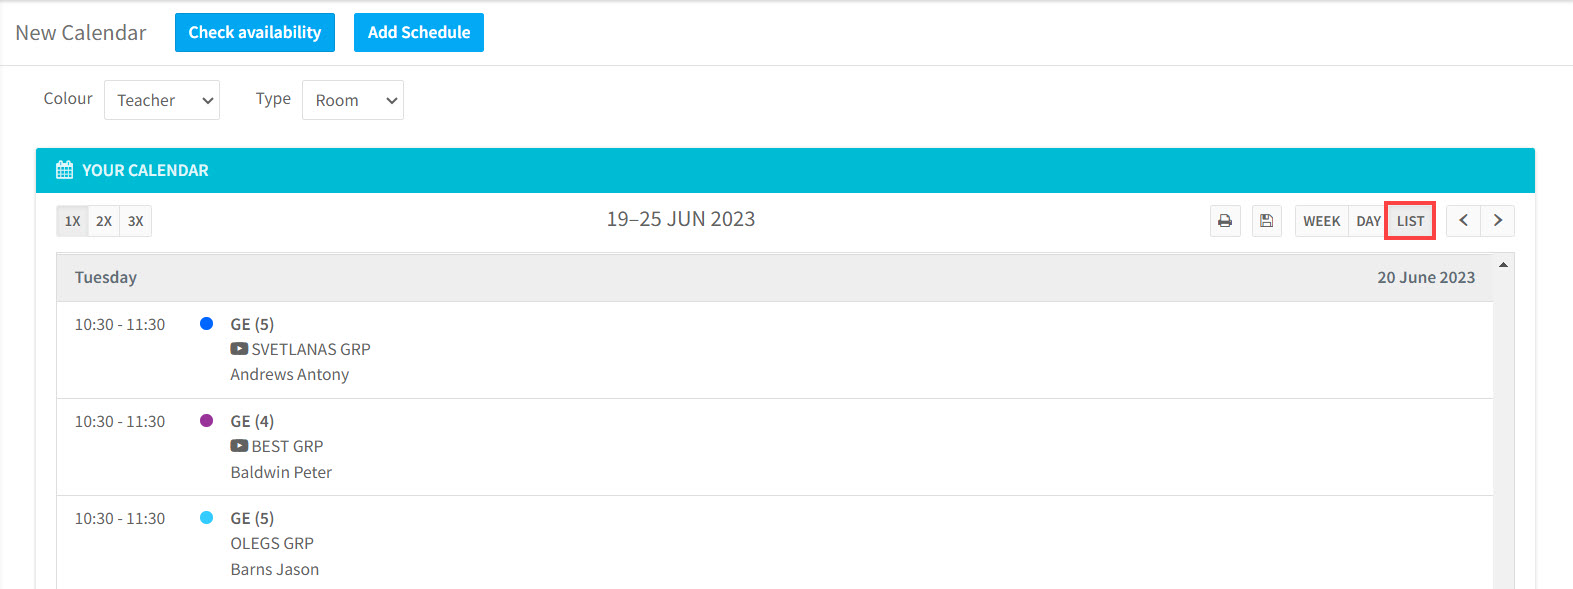
The “List” button changes the view of the calendar as follows:
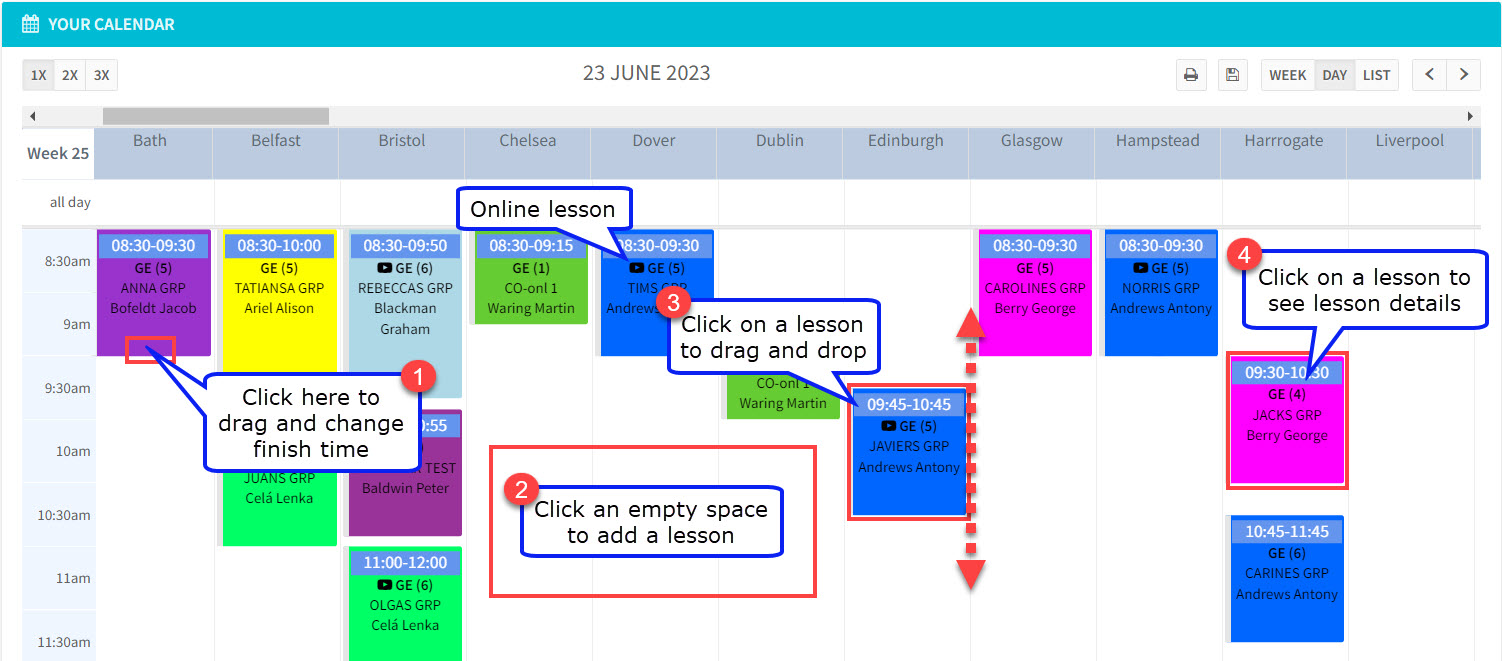
Now we will look at the lower part of the calendar.
- Hover over the end of the lesson to drag the end to a new finish time.
- Click on and empty space to create a new lesson.
- Drag the lesson to a new time. If you want to edit other elements, see class details below.
- Click on a lesson to see the details of the lesson. See below.
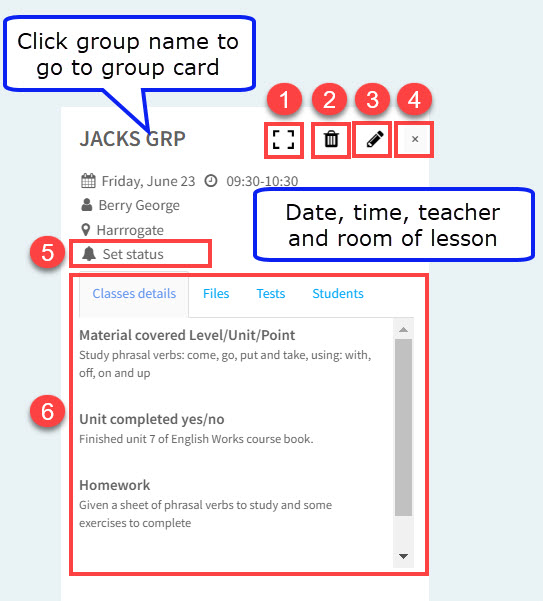
 Class Details.
If you click on a lesson, the details of the lesson will appear:
- Change layout of Class Details.
- Delete lesson.
- Edit lesson.
- Close Class Details.
- Change the lesson’s status: Cancelled late, Cancelled in Advance, etc.
- The lower part shows all the details of the lesson, files and tests added and the students’ attendance as entered by the teacher.