
Forms
A number of cards in the system have a place where you can add custom fields so you can store additional information of your choice.
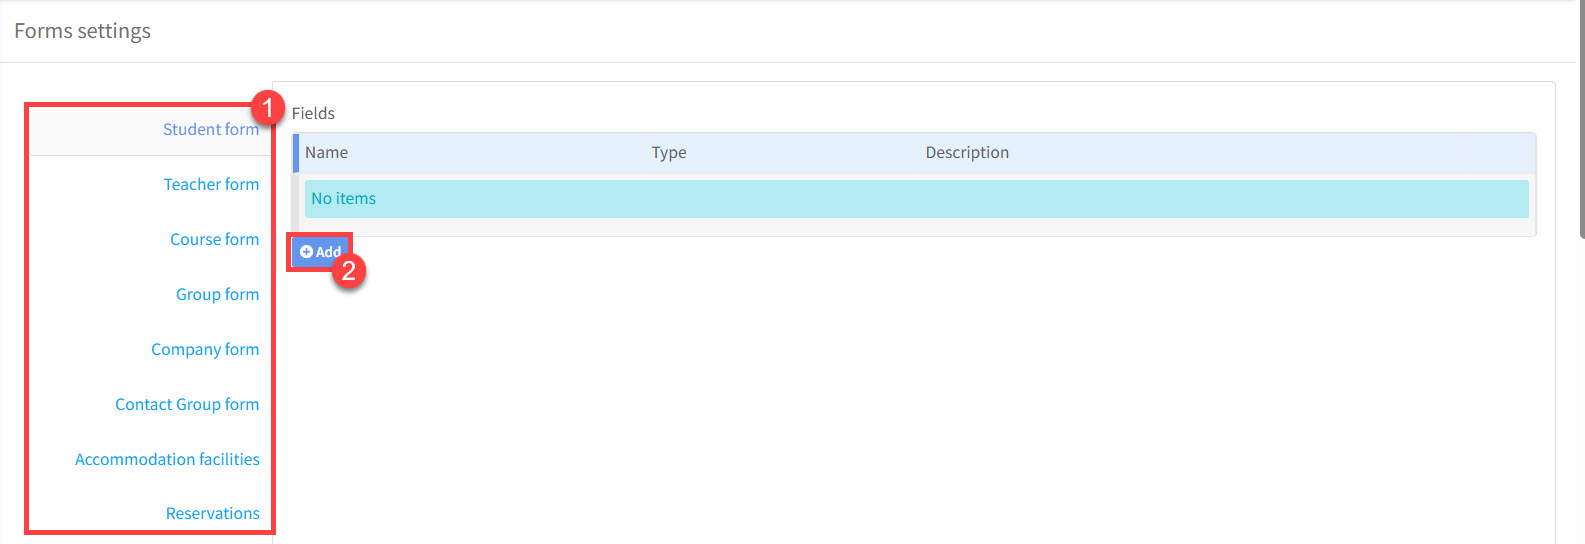
- The cards that can have custom fields added.
- After selecting a card to add a form to, click to add a field.
The custom fields created are displayed on the Additional Information card. Here is an example showing where the custom fields for the Student Form are held on the Student Card: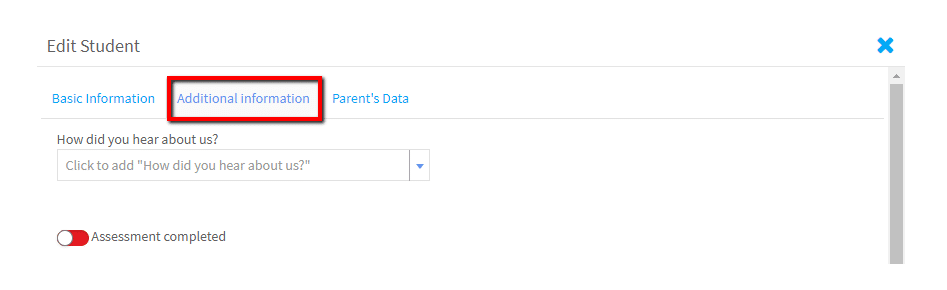
Searching:
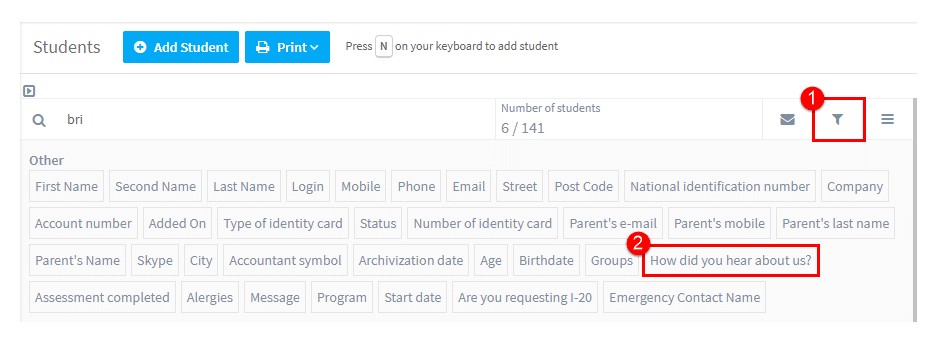
One very useful thing is that you can search your students, teachers etc., using the additional field as a filter.
- Filter
- Example of custom field.
Adding Custom Fields:
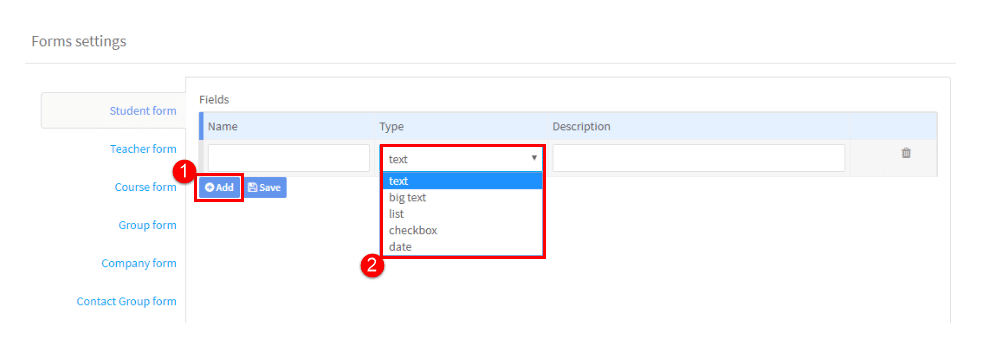
Types of Custom Fields:
- Text – one line of text.
- Big Text – multiple lines of text.
- List – holds items to select from.
- Checkbox – yes/no button.
- Date – date selection box.
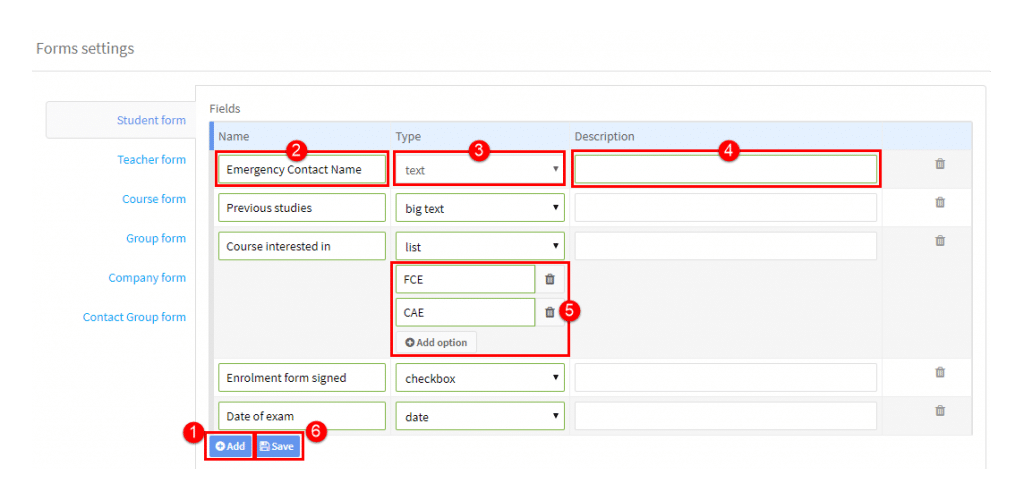
Adding Custom Fields:
After you click “Add” you will need to fill in the details:
- Click “Add” – do this to add extra fields.
- Name the field.
- Type of field.
- Description – not essential.
- If you choose “List”, you will need to add items to the list – “Add Option”.
- Save.
This is what the above looks like on the Student Additional Information Card: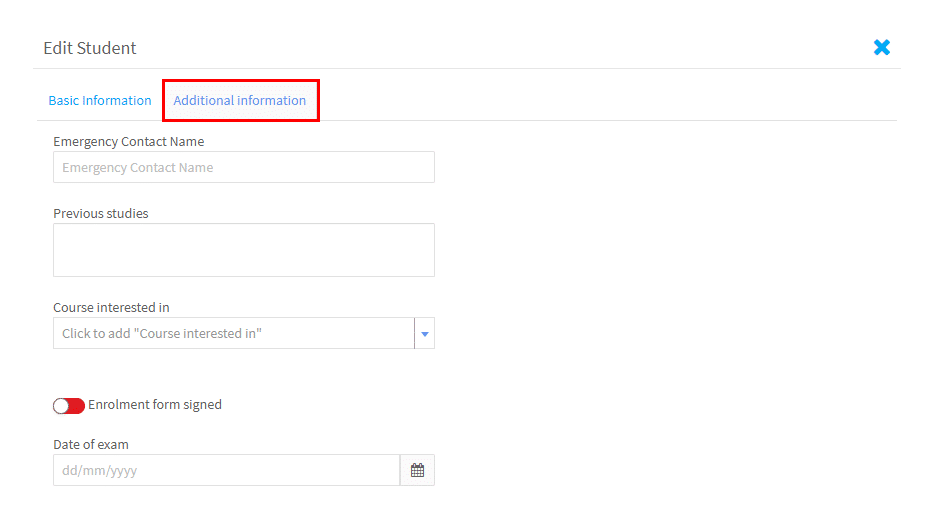
Access Settings:
The fields on these cards can be filled in by teachers and students (or parents) if you allow them to. This can be useful if you want the student to choose their course preference for next year, for example. However, the information on the card might also be of a type that you do not want non-admin people to view.
Once you have saved your custom fields four check boxes will appear:

- Is active – i.e. it appears on the card.
- Is viewable and editable by the student or parent.
- Is viewable and editable by the teacher.
- Is viewable when assigning students to groups.
Untick the box to remove access rights.