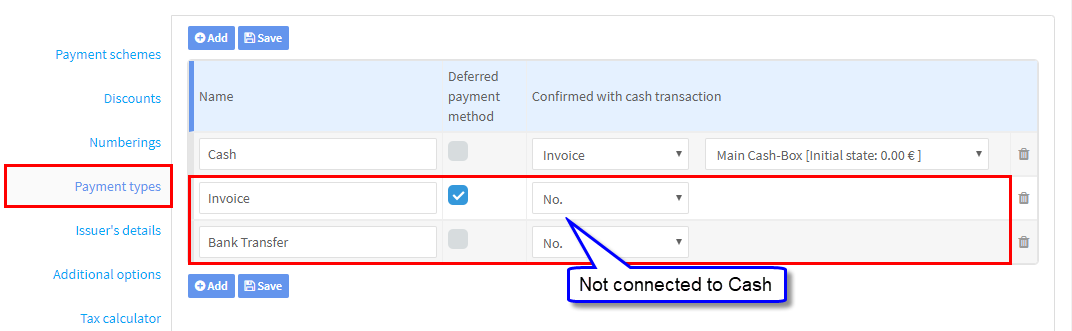
These are payments that are not linked to your cash box. An example could be where you give an invoice to a student and the student will send the payment via a bank transfer.
There are two types of non-cash payments: deferred and non-deferred. Deferred is when the invoice is expected to be paid in the future and non-deferred the invoice is paid as it is issued.
Finance – Payment Types is where you add your payment types and tell the system how to treat them:
We will now look at how deferred and non-deferred payments work.
Non-Deferred Payments:
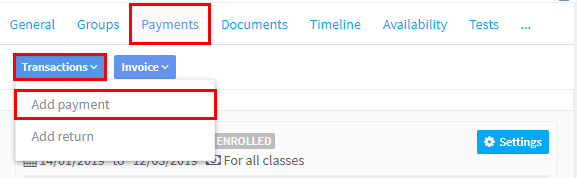
To add a payment go to the Student’s Card – Payments Tab – Transactions – Add Payment:
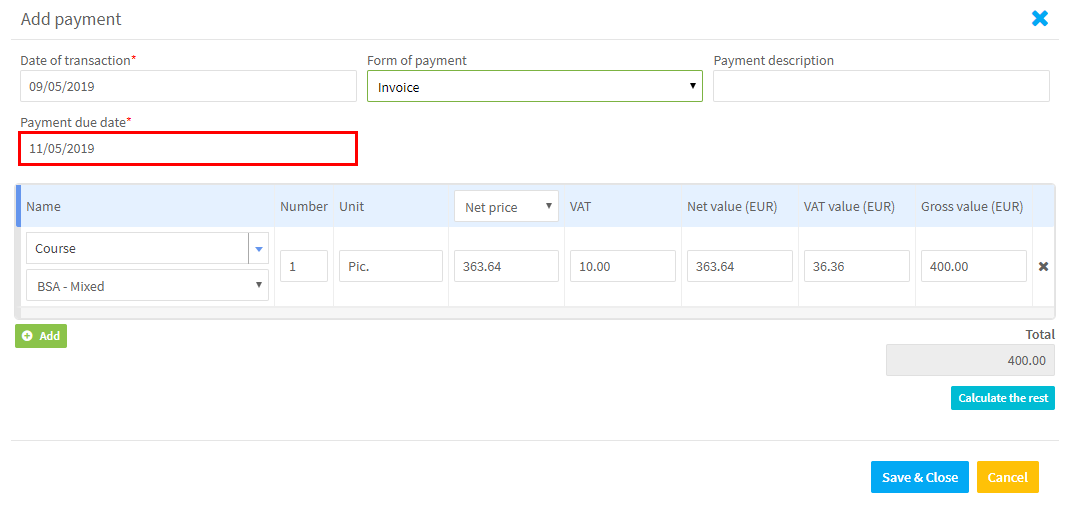
After you have done this a form for you to add the transaction will appear:
- Select the form of payment.
- Select what the payment is for.
- You may need to choose from a drop-down.
- Add a payment description. You can see it appear in 3. below.
- The amount scheduled by the system to be paid appears but you can change this.
- You can use this to calculate how much remains to be paid after a partial payment.
- Click “Save & Close”.

Now that we have added a payment, at the bottom of the Payment Card we can see the following:
- Edit the payment details.
- Transfer the payment to another of the student’s courses.
- The payment description added in 4. above.
We have added the payment but we still need to create the invoice.
If we go to Finance – Transactions, we can see the student’s payment:
- Payment description that was added.
- Edit or remove the cash payment.
- We can also create an invoice for the payment.
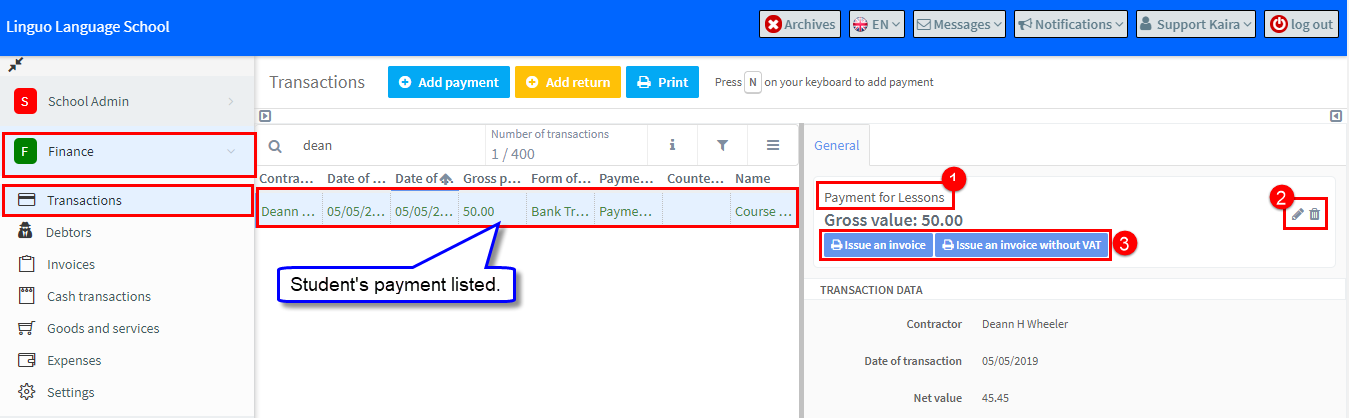
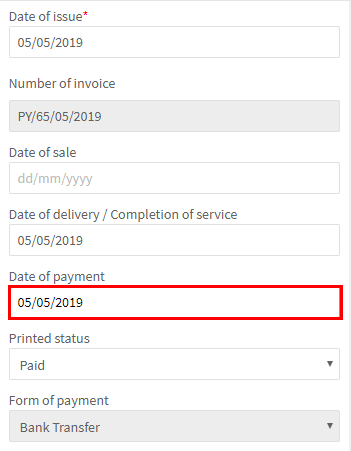
To create an invoice for the student click 3 above, you will see the invoice details (you can add the date of payment):
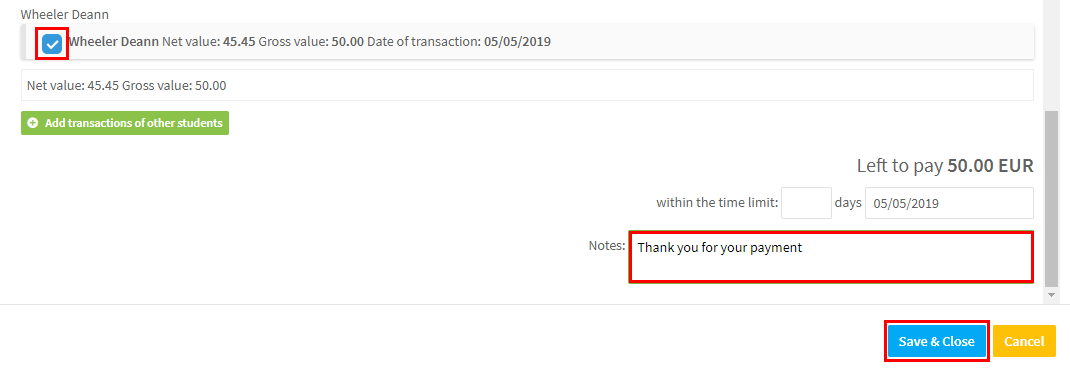
Add a note if required and click “Save & Close”:
Now if we go to Finance – Invoices, we can see the invoice that was created listed:
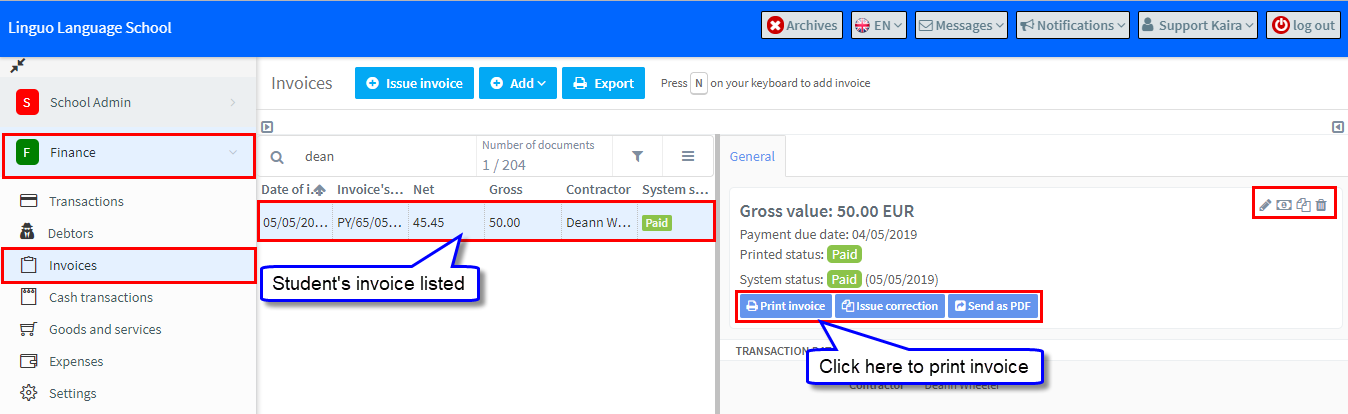
The items on the right above allow you to:
- Edit the invoice.
- Change the System Status (paid, not paid) of the invoice.
- Issue a duplicate of the invoice.
- Delete the invoice.
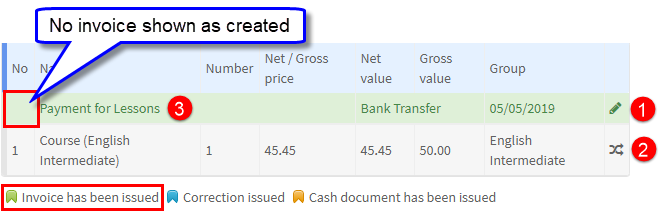
Now at the bottom of the Student’s Card, Payment Tab we can see that the invoice is shown as created and we can print it out:

Deferred Payments:
The main difference between a deferred and non deferred is that with a deferred payment we need to add the expected payment date. You can see that the system will ask for a Payment Due Date. There is a default number of days added automatically but you can override it. The default is controlled in Finance Settings.