
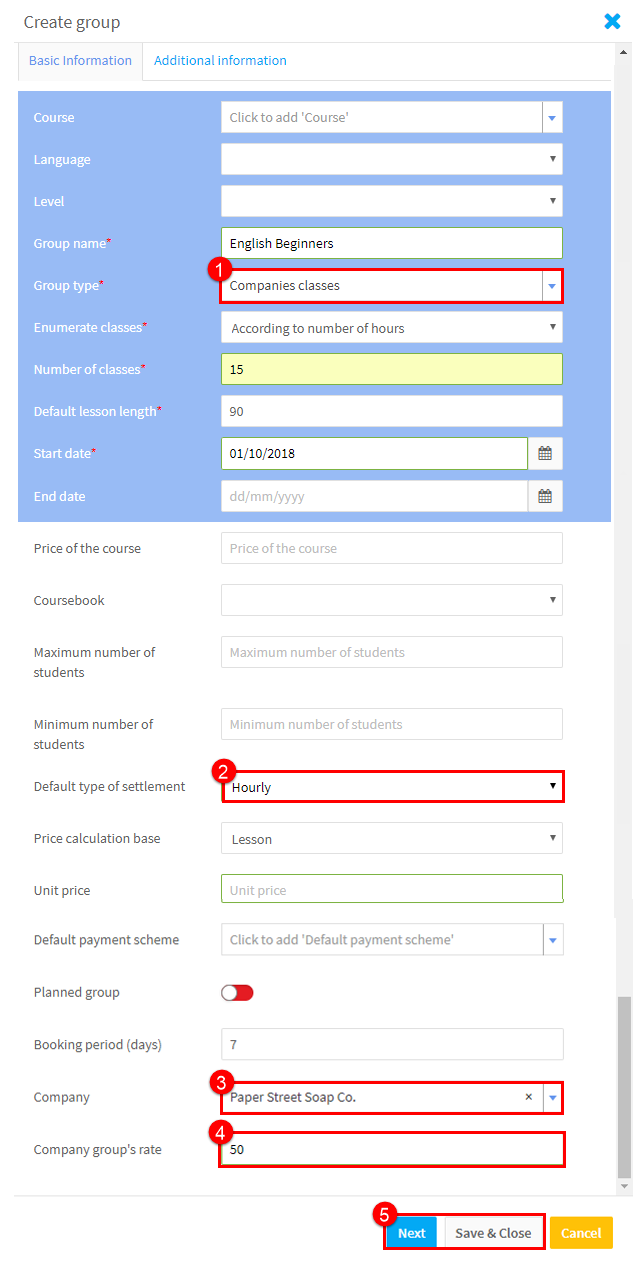
This is very similar to adding a public group, but some special points are:
- Group Type – Select Companies classes.
- Select the Settlement Type – whatever you choose: hourly or for all lessons you will need to enter the company’s group rate for one lesson in 4.
- Select the Company.
- Enter the company’s group rate for one lesson.
- If the students who are going to be in the group have already been added to the system, click “Next” and you will be able to assign them to the group from the list of students that will appear. If they have not, click “Save ” and you can assign them after you create them.
I created a group but forgot to mark is as a company group. What can I do?
Go to School Admin – Companies:
- Find the company you want to assign the group to.
- Go to the Groups tab.
- Click on the Assign group button.
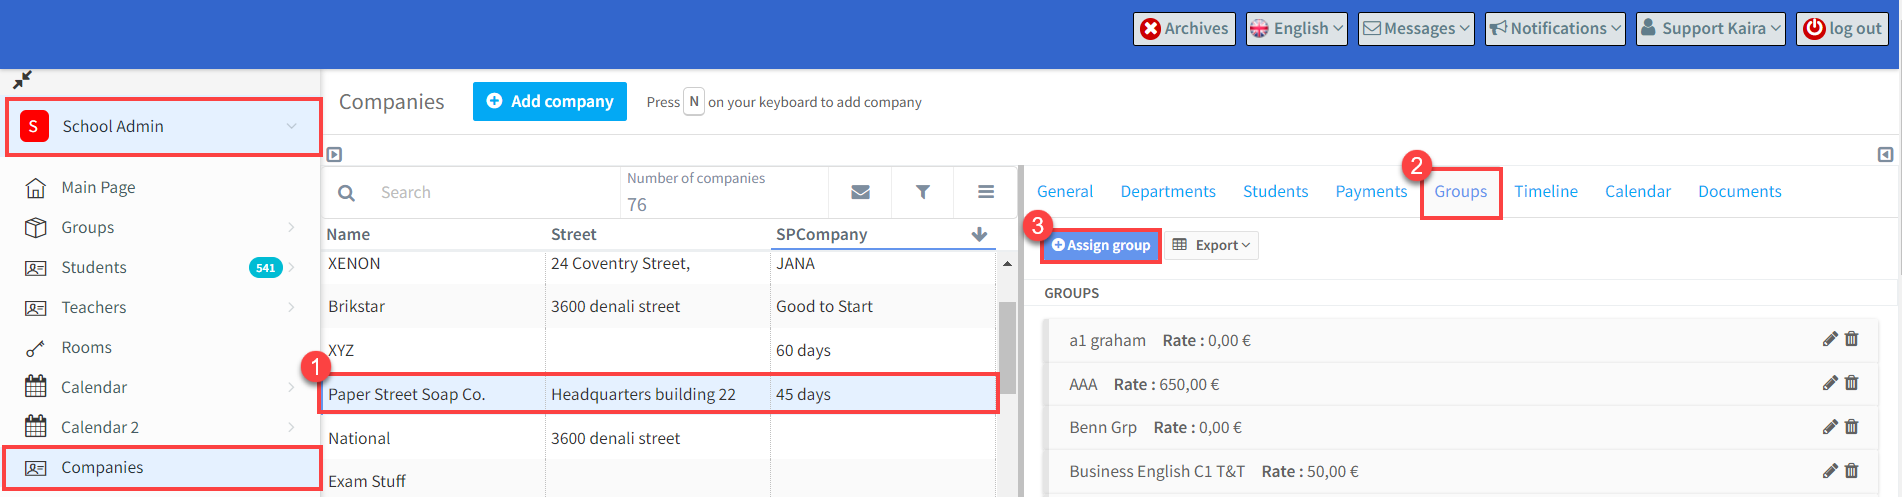
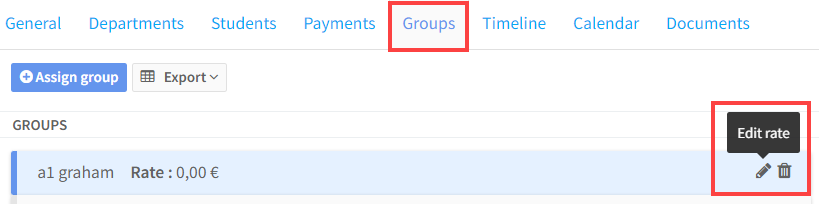
After you have done the above, a list of groups is displayed in a new window. Select the group(s) and click “Save and Close”. Now, you only need to add a company billing rate. Select the “Edit rate” icon, enter the amount and confirm.
You must do the same if you have created an individual group for a student and now you want to assign it to the company.
A student has been added to a company group but is not appearing in the list of students.
If you have added a new student to a company group, they will not appear on the list if they are not assigned to the company. Go to the Company’s – Students card and click Assign students from groups.
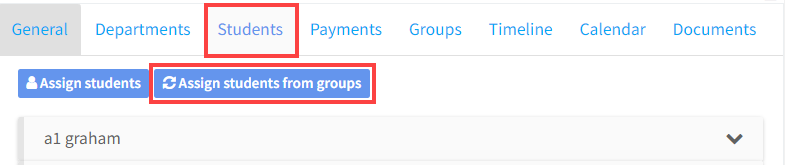
Select Yes from the options that will appear, and the unassigned student(s) from the company’s groups will be assigned to the company:
