
The Classes menu item gives an in depth look at your classes:
Classes Details:
- Click “Classes” on menu and “Classes details” from the drop-down.
- Select the group you want.
- Select the dates for the lessons you want.
- You can print out details of all lessons.
- You can Add a lesson (if you have permission).
- If you share a group with another teacher, all lessons will show. If you only want to see your own, click the button.
- Class details – when you fill in attendance and details about the lessons these icons will appear.
- Where to add and see lesson details (see more below).
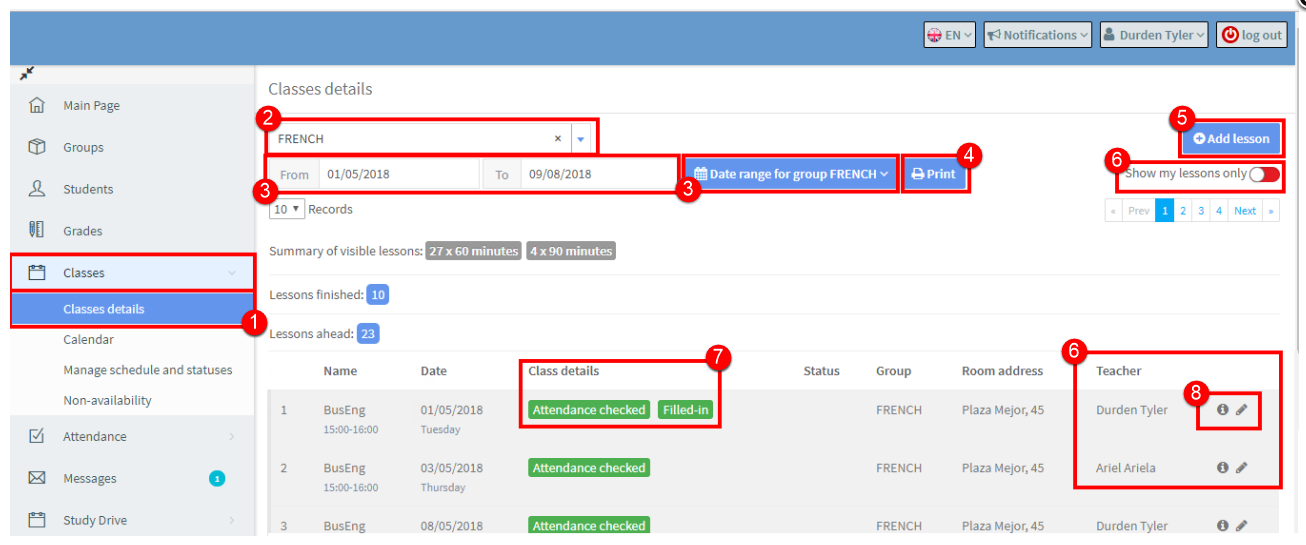
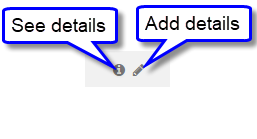
To add or see lesson details click on one of these two icons:
Add Classes Details:
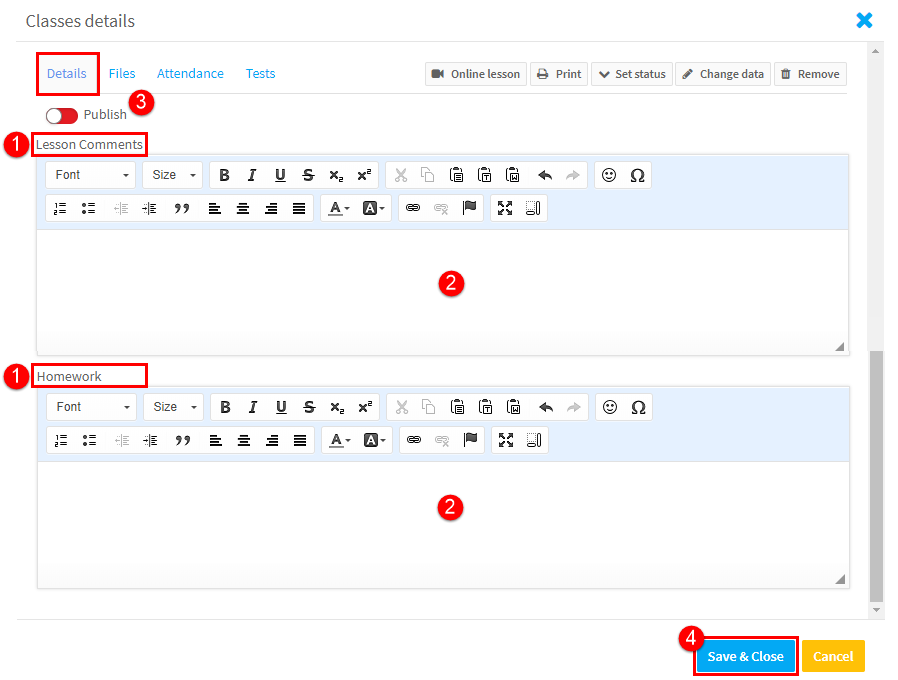
If you click on the “pen” icon, the following will appear:
Details:
This is where you enter what happened in the lesson etc.,
- These are the items your school has decided it wants details on for each lesson.
- Enter details.
- If this is left unpublished, then students will not be able to see the details. Click to turn green and the details are published.
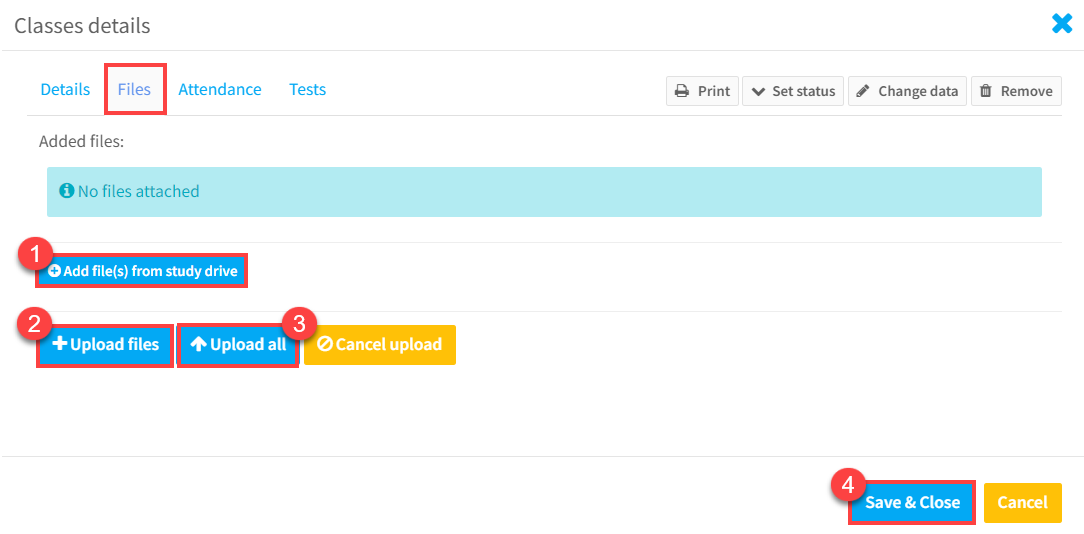
Files:
If your school has the Study Drive module activated, you will be able to add files from your Study Drive or from your computer and attach them to a lesson. Students will be able to see and download these files when they log in.
- Click here to add files from your Study Drive.
- Click here to add files from your computer.
- If you are uploading multiple files, clicking this will upload them all together.
- Save & Close.
After you have uploaded your file, you will see it attached to the lesson:
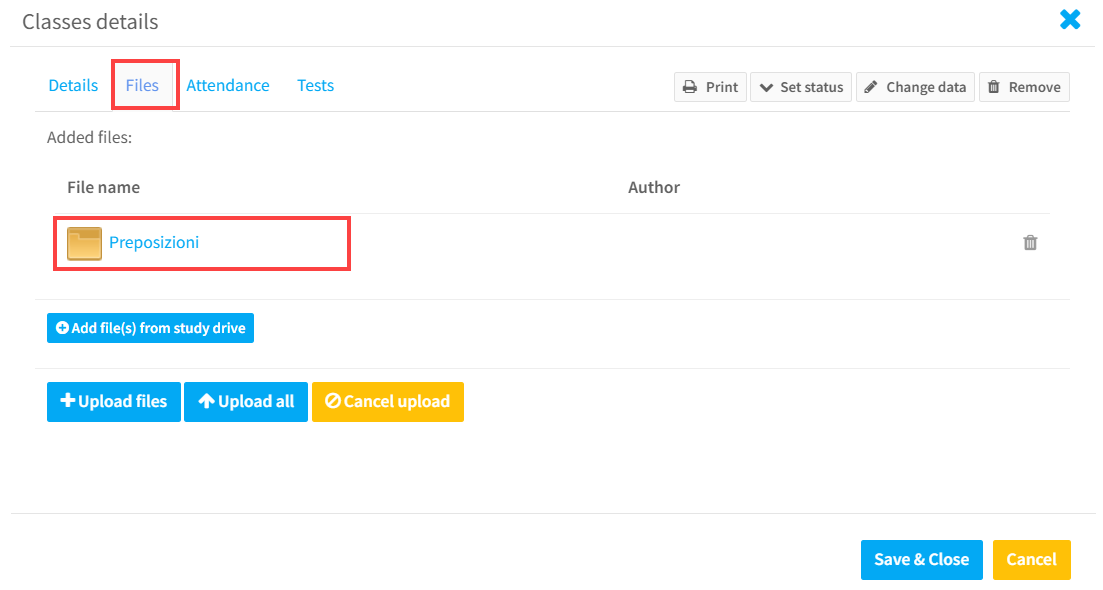
And it will be noted in Classes Details.

There is one more section on this page to explain:

Once again, whether you can see and access all of these depends on your permissions.
- Online Lesson – If your lesson is online, you can start the lesson by clicking here.
- Print – This will print out all the details of the lesson including comments added etc.,
- Set Status – Statuses are set by default to be that the lesson was taught as expected. If that is not the case and it was cancelled late/ in advance etc., change the status of the lesson by choosing the correct status from the drop-down menu.
- Change Data – Change the day, time etc.,
- Remove – Delete the lesson.
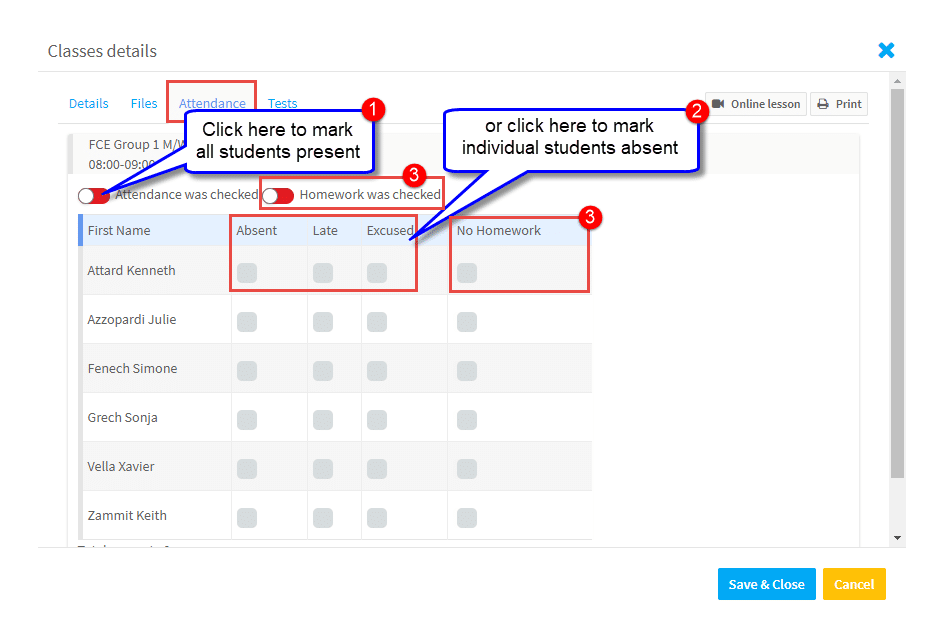
Attendance:
You can enter the attendance for a series of lessons here, but here you enter the attendance for a single lesson:
- Click the button to turn green and mark all students present that day, or
- Click the students who were absent and why. The rest will all be marked present automatically.
- Do the same for the homework if given and done/not done.
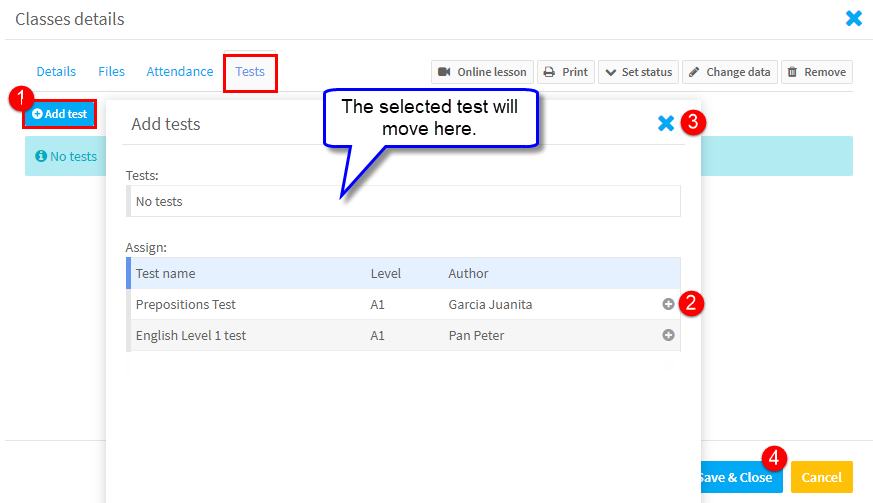
Tests:
If your school is using the Study Drive module, you will be able to create your own tests or upload tests created by the school to your groups for students to complete as homework.
- Click “Add Test” on the Test Card.
- Select the test.
- Close the card.
- Click “Save & Close”.
There is more information on how to create tests here.
Calendar:
What you can do and see in this section is controlled by how your permissions have been set by your Administrators. With minimum permissions if you click on the “V” on a lesson in your calendar this will appear:
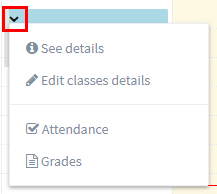
- See Details – will show you what you have entered about the lesson here.
- Edit classes details – will allow you to enter information about the lesson as here.
- Attendance – this takes you to the Attendance for that day’s lesson.
- Grades – this takes you to the Grades menu item for the Group if it has been created.
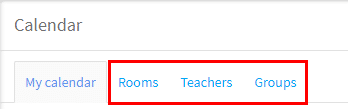
If teachers have full permission, you will see these three extra tabs:
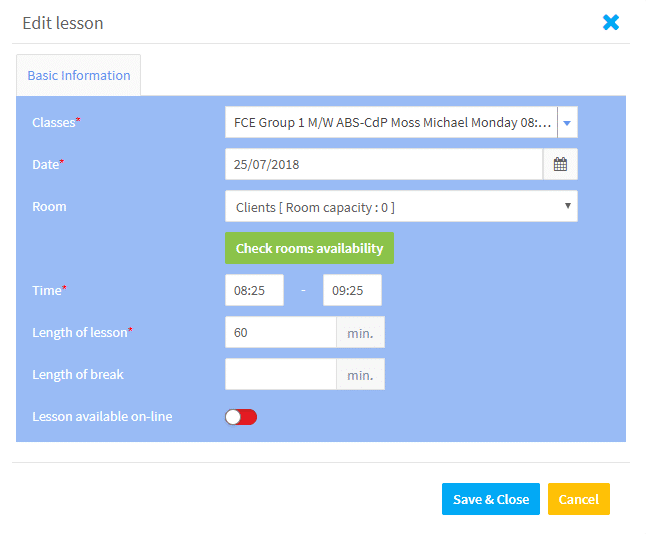
If you click on a lesson in one of these tabs, you will see the following and be able to edit the day, time etc., of your lesson:
Manage Schedules and Statuses:
If this is enabled and you click on a lesson, you can:
1. Edit
- Change the date, time etc.,
- Remove the Status of the lesson
- Change the Status of the lesson, for more on lesson status click here.
2. Delete the lesson
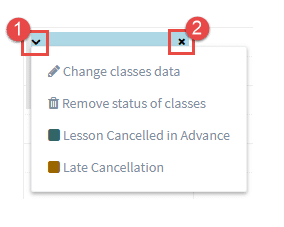
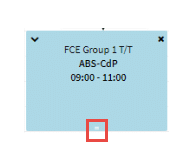
3. Drag and drop – if you place your cursor on the lesson, you can drag it to another day, time etc., You can also change the end time by clicking and dragging the white line at the bottom:
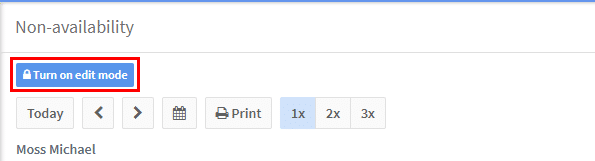
Non Availability:
When your school is searching for available teachers for lessons, if you have said that you are unavailable to teach, you will not appear in search results for that day and time.
- Click “Turn on edit mode”:
- Click on the Calendar and the following will appear:
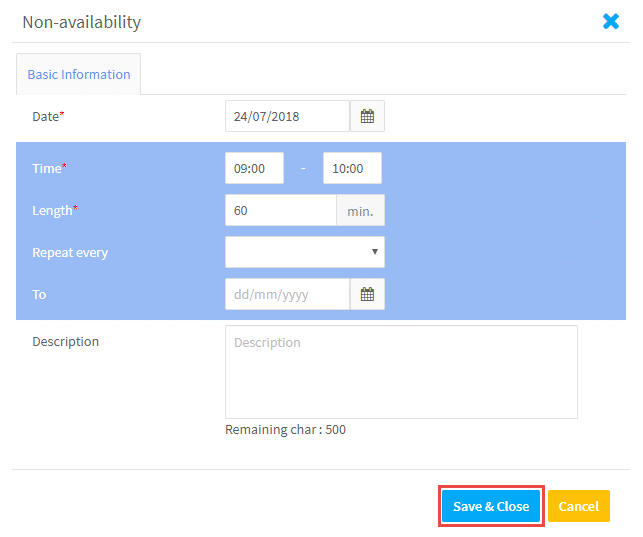
- Add the date, time etc., when you are unavailable. If it is for an extended period of time, you will need to enter the To Date. If is not every week that you are unavailable, you can select other options using the Repeat drop-down.
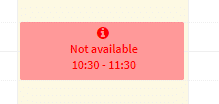
- When you have finished “Turn off edit mode” and the unavailability will show in your calendar:
- To edit, remove etc., click “Turn on edit mode”.