
Schools can now offer online lessons via their SchoolMate account using: LearnCube, Google Meets, Microsoft Teams and Zoom.
Getting started with Zoom:
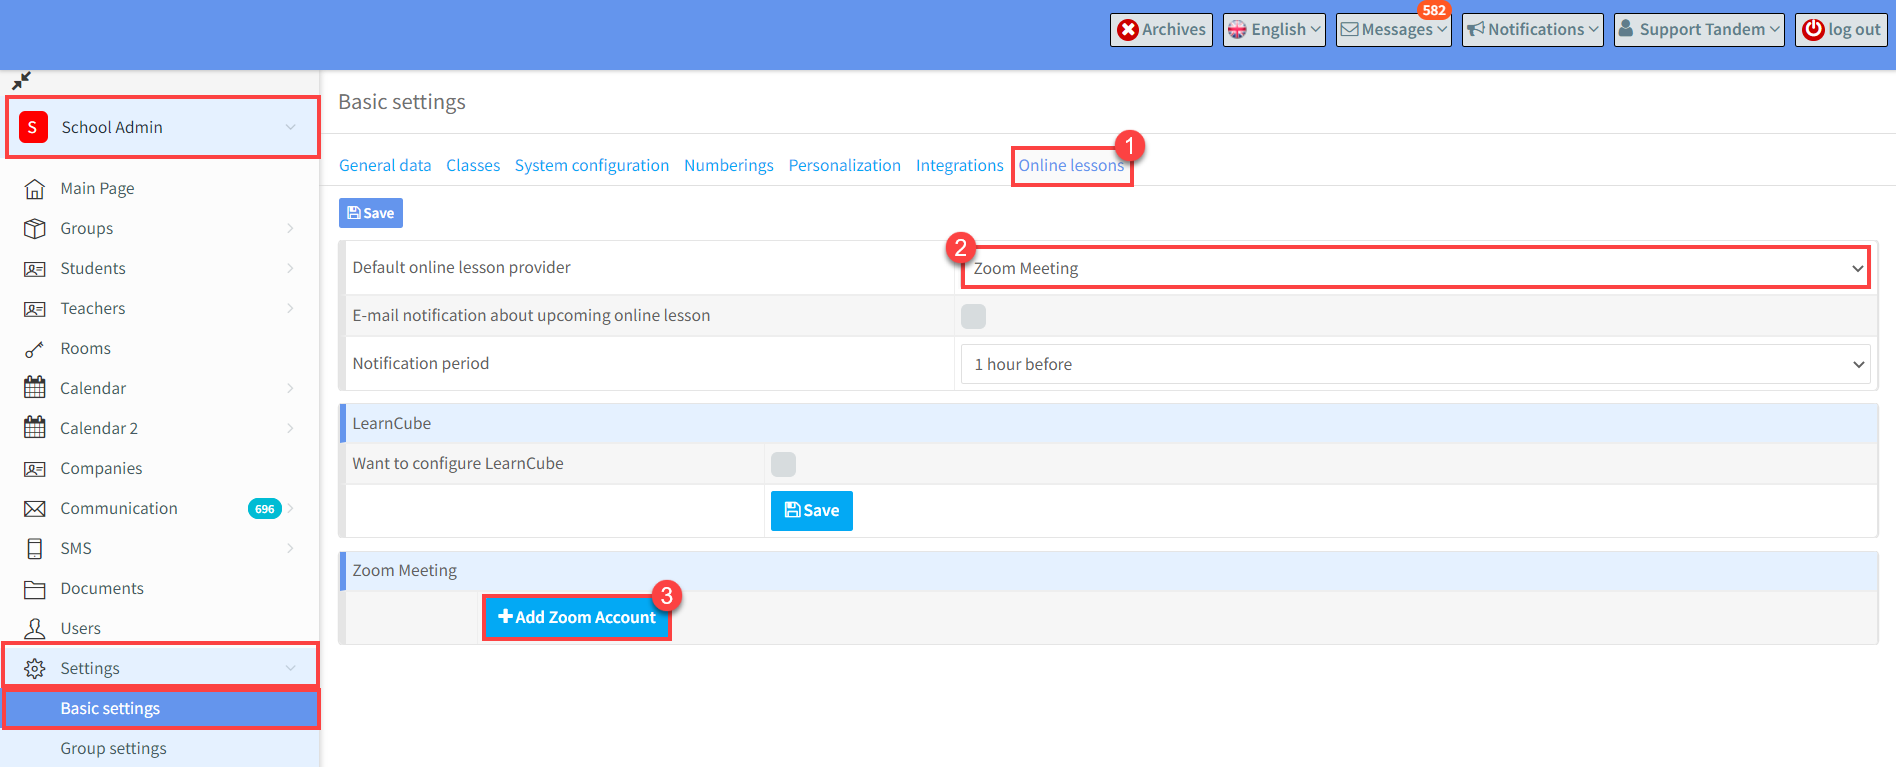
First, you need to add your Zoom account details. Go to School Admin – Settings – Basic Settings.
Then:
- Click “Online Lessons”.
- Select Zoom Meeting from the drop-down as your default online lesson provider.
- Click “Add Zoom Account”.
Then login to your Zoom account:
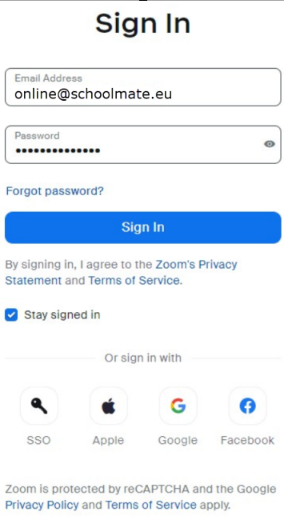
If successful, you will see a message saying “‘Your Zoom account added successfully”.
To confirm return to the “Online lessons” card (see above) and you should see your linked email address with a zoom meeting.

Now, you have two new options available:
- Sync Users: – This is used to link Zoom to teacher accounts which already exist in the system.
- Remove zoom account: – This is used to remove the Zoom linked account.
How do I add Zoom accounts for teachers?
After connecting your Zoom account to SchoolMate, go to the Teachers section, select a teacher, click on the pencil icon (Edit) and in the “Basic information” tab:
- Select the Zoom user of this teacher (Zoom users are downloaded automatically from the main account settings).
- Click “Save & Close”.

IMPORTANT INFORMATION
- You do not need a Pro account or higher to support simultaneous lessons. Just add your credit card details to be able to add users (the fee will not be charged).
- Users’ data in Zoom does not have to coincide with the teachers’ data in SchoolMatet.
- For people who have already connected Zoom accounts and there are recurring problems (e.g. error messages), please re-link Zoom and SchoolMate accounts.
How to configure simultaneous sessions?
How to join an online Zoom lesson?
When a lesson is due to start the teacher can log in on their account and on the main page they will see their planned online lessons and join by clicking on the “Join” button, Zoom will open in the new tab to download the application, and after that, an automatically dedicated room will open. Students can then join the teacher.
You can find more about Zoom (eg. quick start, tutorials, videos and more) at https://support.zoom.us/
How to remove the account?
Just click Remove button next to the linked account in the Settings tab. The account will be unlinked and credentials removed from the system.