After you have created your teacher in the system, a card will be created:
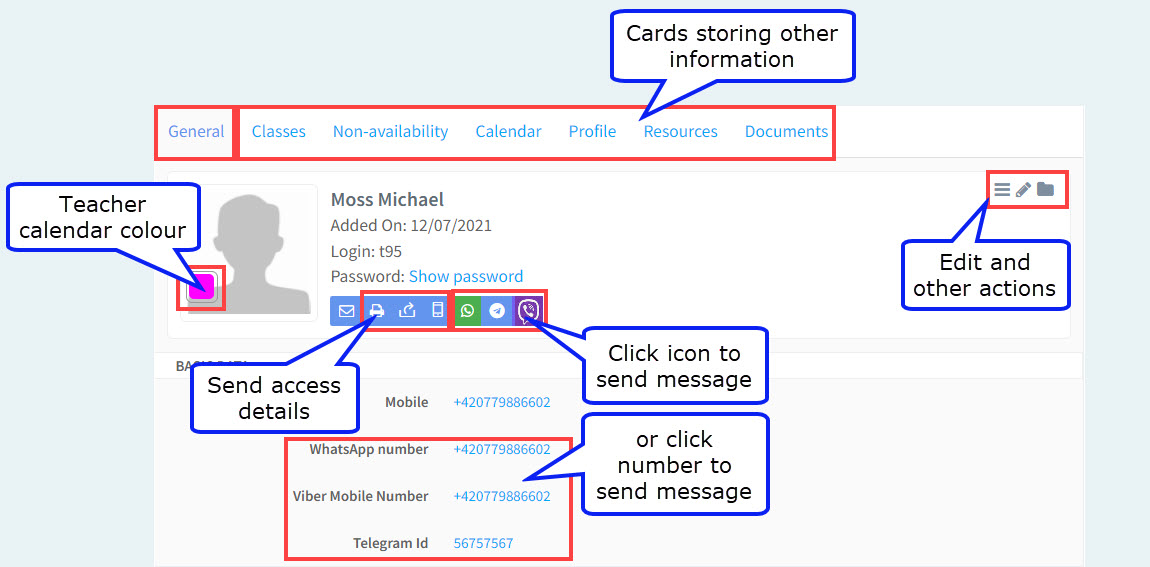
Cards Storing Information:
The top line contains cards of different sorts of information which will be covered elsewhere in this tutorial module.
Sending Access Details:
After you have created your teacher you may want to send them details of how they can access their account:
The first button will send a system message, but as they cannot access the system yet we cannot use that.
![]() This button will print out their access details.
This button will print out their access details.
![]() This button will send their access details by email.
This button will send their access details by email.
![]() This button will send their access details by SMS.
This button will send their access details by SMS.
To learn how to bulk send teachers’ access details via email click here.
Messaging Platforms:
You can send messages directly to teachers’ mobiles using a number of different messaging platforms. There is information on how to do that here.
Edit and Other Actions:
Clicking on the 3 lines will make this appear: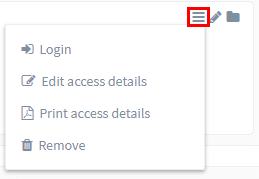
- Login – This option allows you to log in as that teacher. This is useful if you want to check what they can see and do.
- Edit access details – Here you can change the teacher’s user name and password.
- Print access details – Prints out the teacher’s user name and password as in the last section.
- Remove – delete.
Edit Teacher:
Clicking on this icon
![]()
will open up the teacher card and you can edit it.
Archive Teacher:
Clicking on this icon
![]()
will archive the teacher. You can find out more about Archiving here.
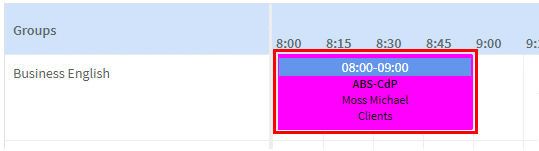
Teacher Colour:
You can select a colour to be associated with the teacher. When you look at the calendars you will see items in the colour associated with the teacher: