
Fatturazione Elettronica
For our Italian schools we are happy to announce that SchoolMate can now produce invoices in XML format that can be uploaded into the Italian government’s invoice database. We have formatted these files to work with Aruba and any other SdI who work to this standard.
How do I start using it?
First you must have the Finance Module activated in your SchoolMate account. Go to School Admin – Settings – Basic Settings – System Configuration and activate.
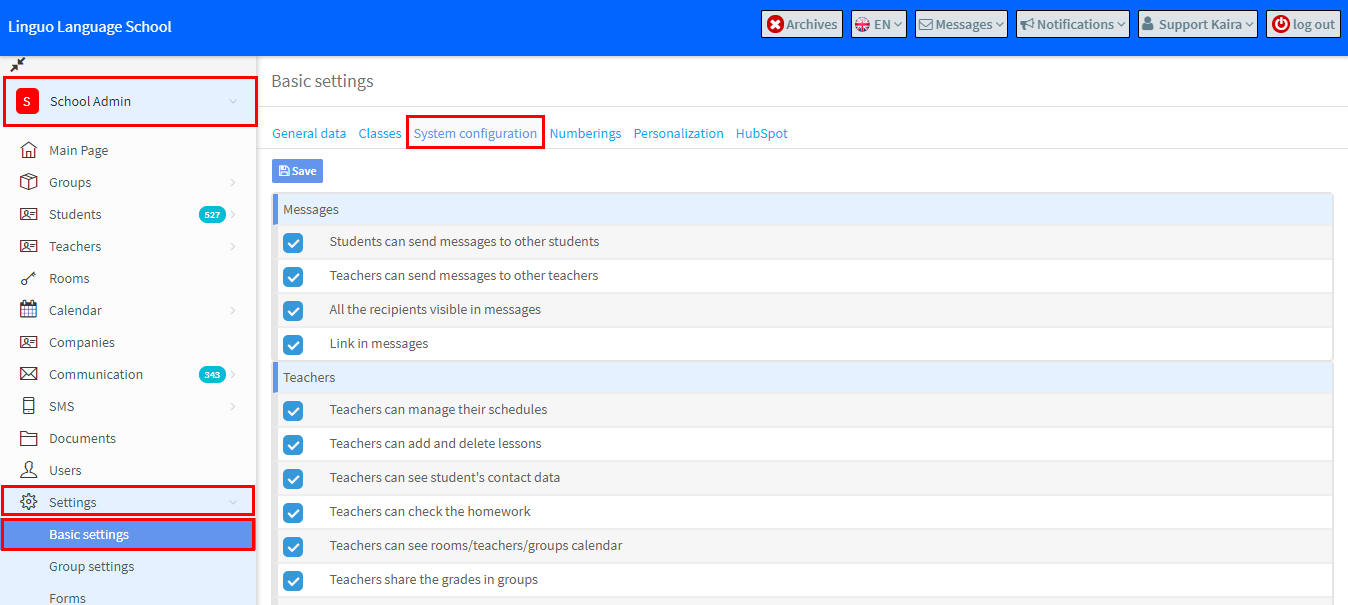
At the bottom of the page is the box the must be ticked.

What happens when Fatturazione Elettronica is activated?
Issuer Details
Firstly, you will need to add your school’s finance information.
Go to: Finance – Settings – Issuers Details and enter the following fields:
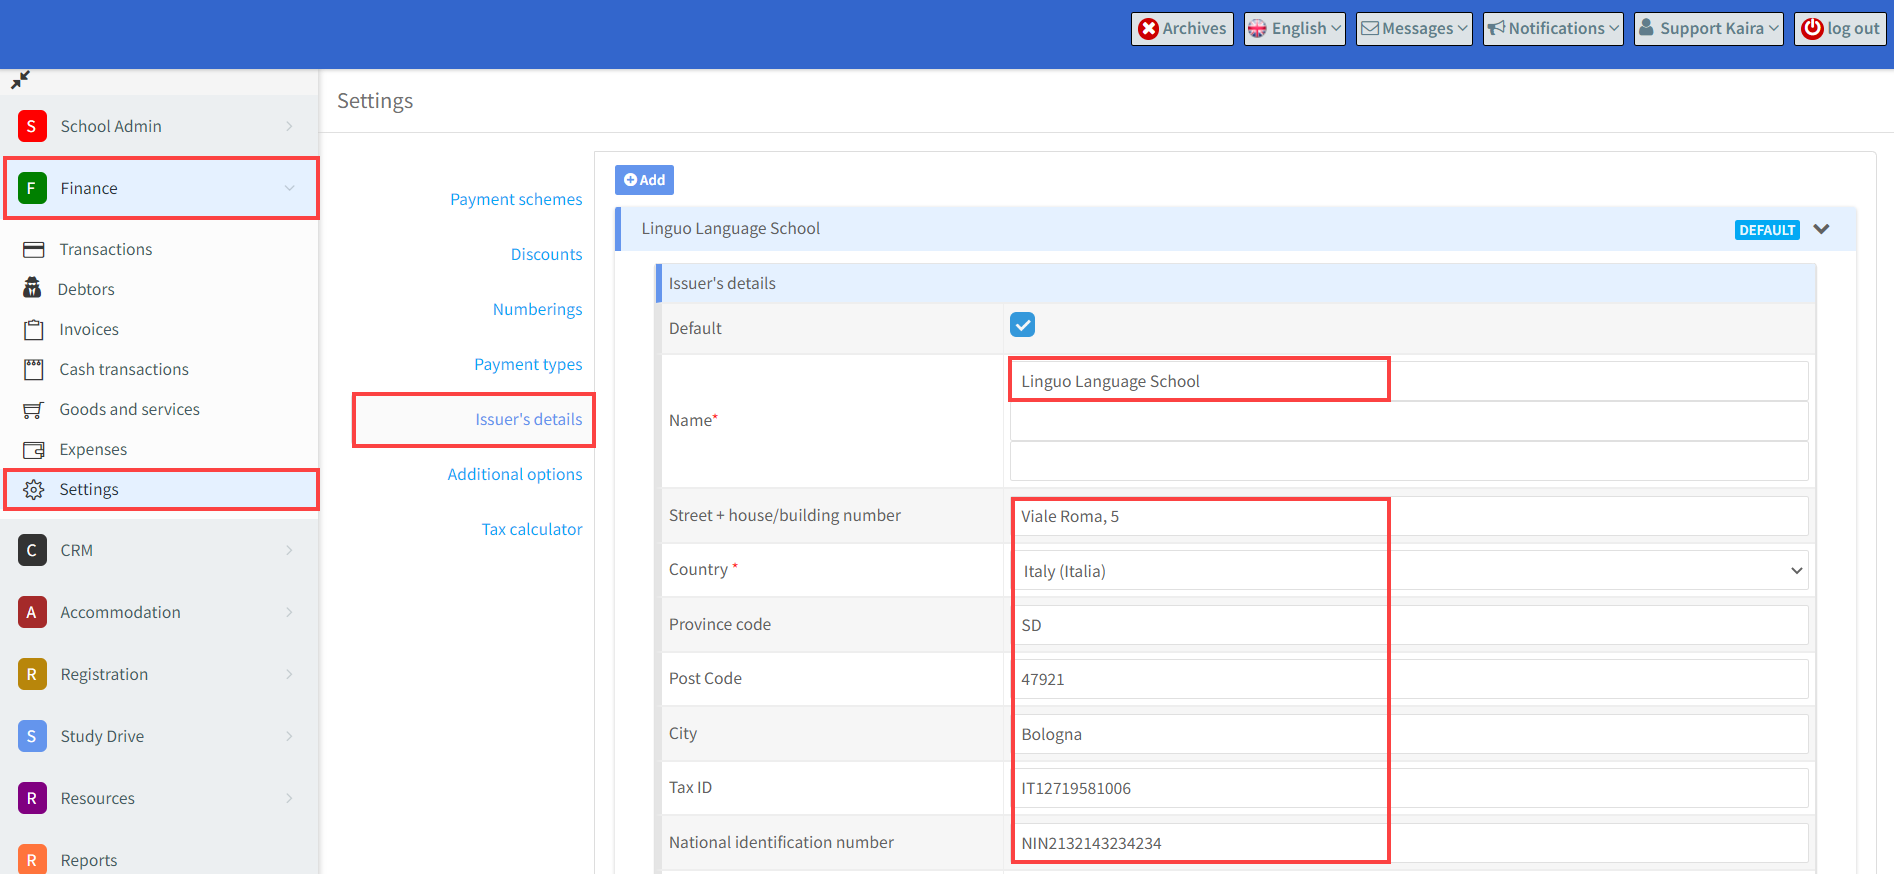
A number of new fields are created in your account, the following are examples of the changes:
Creating a Company.
Now when you create a company you are required to insert additional information.
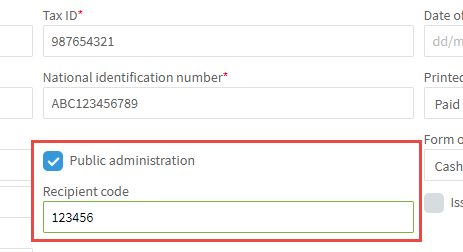
Creating a Public Administration type Company:
- The organisations National Identification Number.
- Tick that it is a Public Administration type of organisation.
- If box 2 is chosen, box 3 will disappear.
- Enter the Recipient Code.
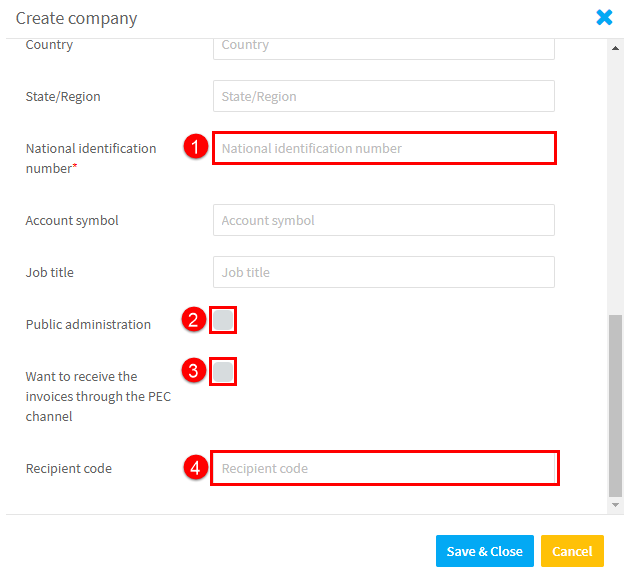
Creating a non-Public Administration type company:
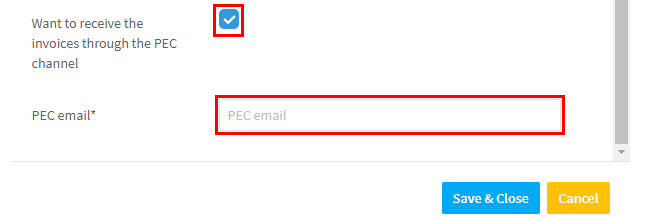
Follow as above, but do not tick box 2, and enter the Recipient Code in box 4. If your company wants to receive invoices via the PEC channel, tick box 3. If this is ticked, the page will change so you can enter the PEC email address as follows:
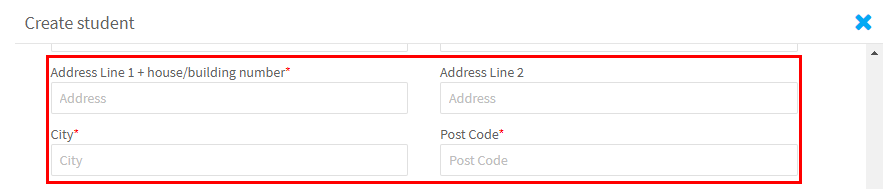
Creating a Student:
There are some additional address details required:
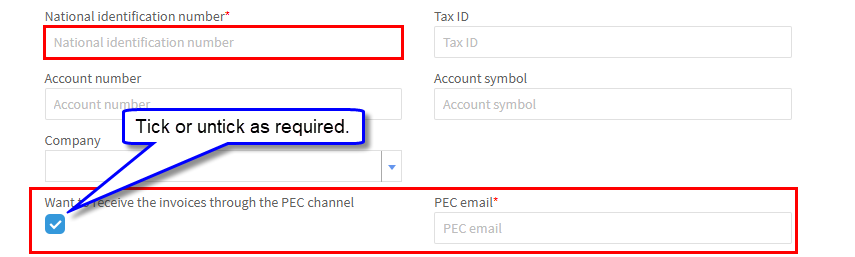
And you need to add Identity number and enter if the student wants to receive the invoice through the PEC channel. If this is unticked, you can enter the Recipient Code:
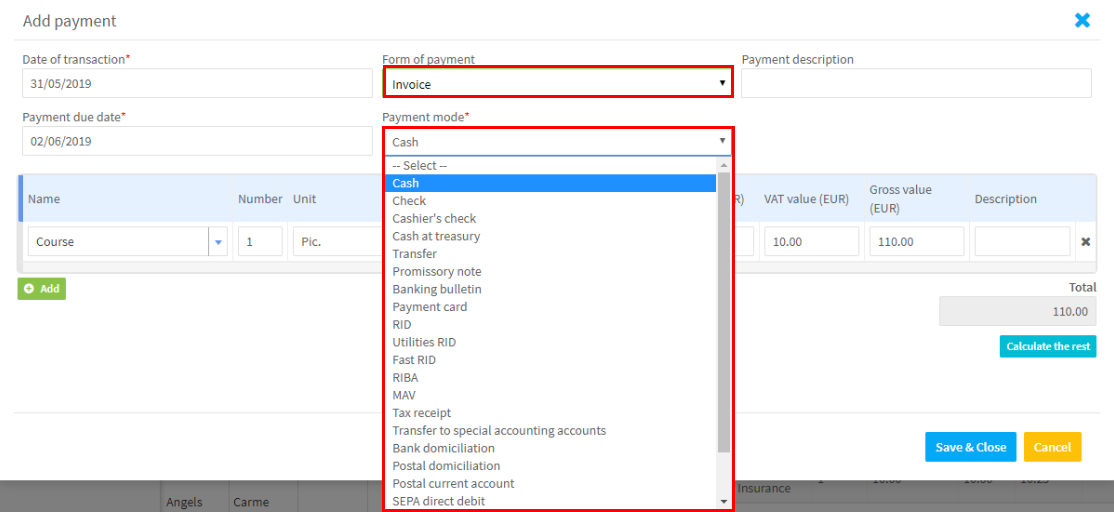
Creating a Transaction:
Now when creating a transaction for a company or a student, you need to tell the system the method of payment:
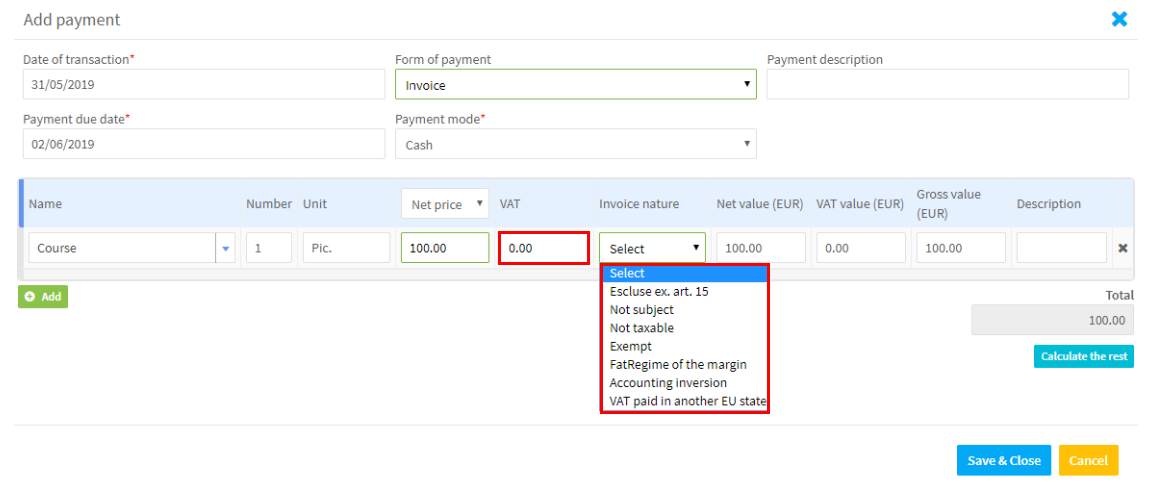
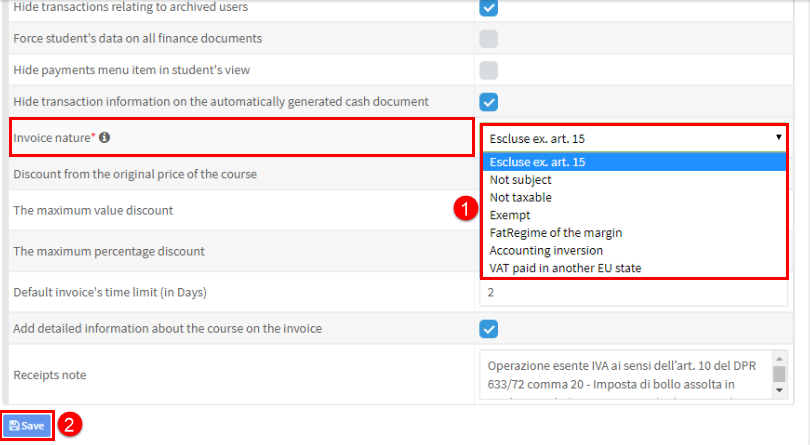
If an item in the transaction is zero rated for VAT, you have to select the reason:
If your invoices are generally of one particular type, you can choose a default to be automatically filled in (It can be overridden). The default setting is is in Finance – Settings – Additional Options:
- Select the default invoice type.
- Click Save.
Creating Invoices:
Creating an invoice for a company:
When creating an invoice the default choice and data that is on the company card will appear automatically.
or:

Creating an invoice for a student:
This works exactly the same as creating an invoice for a company. The default information on the student’s card is placed on the invoice and in the case where a parent’s card has been created the parent’s data is placed on the invoice.
Creating an XML file of invoices:
Typically this is done at the end of the day so that all invoices can be upload at once. Go to Finance – Invoices – Export:
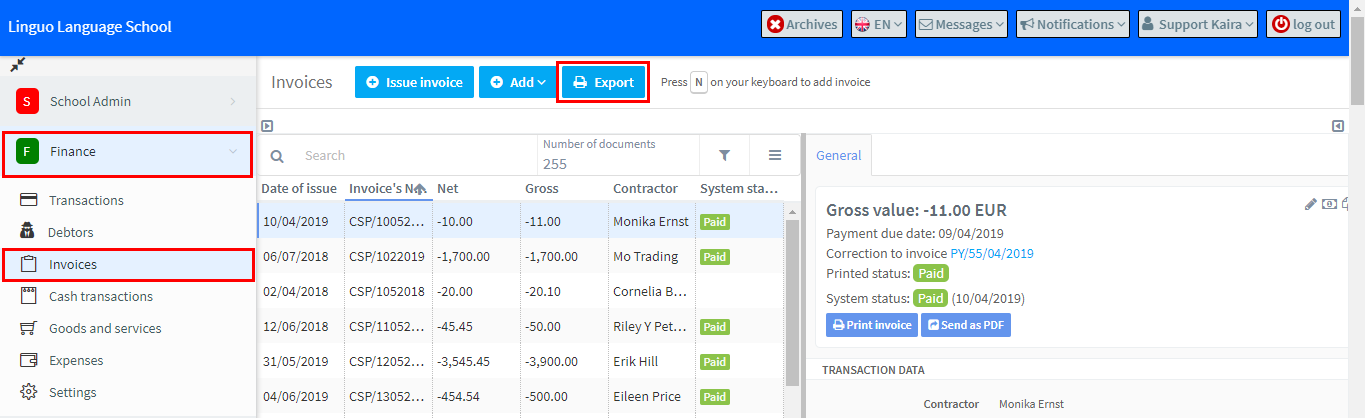
After you click on Export:
- Enter the dates you want to export.
- Choose XML from the drop-down.
- Save & Close.
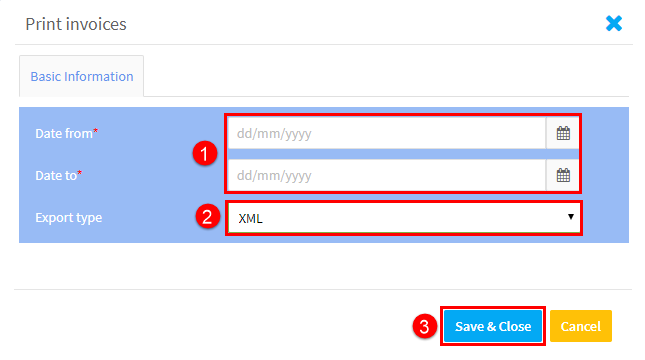
This will then give you a zip file to upload to your SdI.