
Attendance
In Attendance you can add details for a single day or a range of dates:
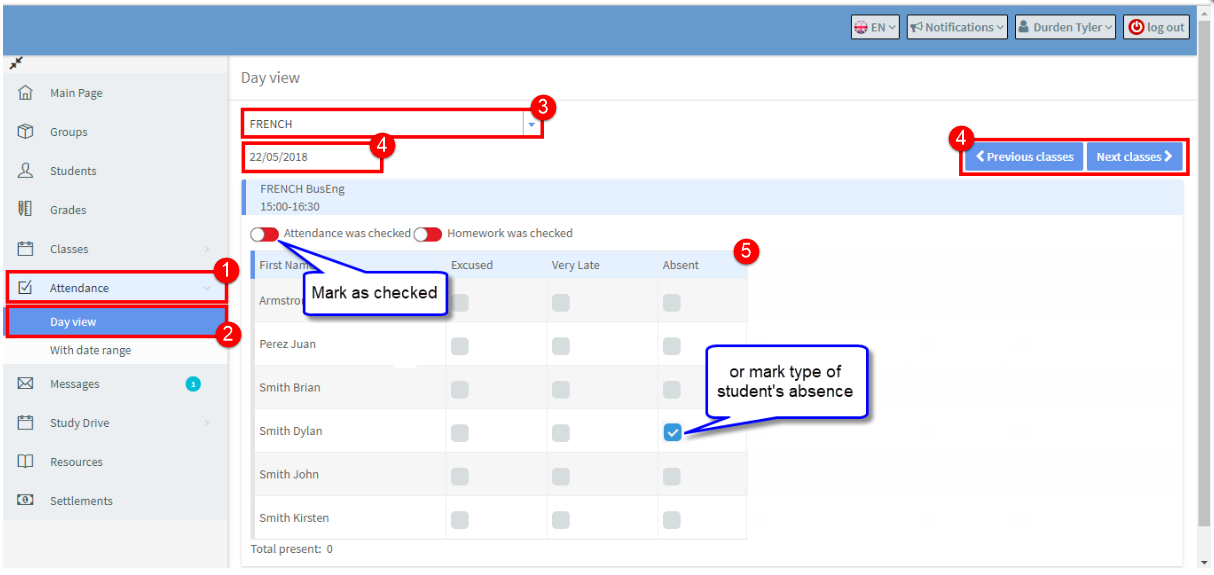
You do not need to mark individual students as present but only the absences. The system will mark all not absent students as present automatically.
- Go to Attendance.
- Day view will open.
- Select the Group you want to mark.
- Change the date displayed if you want.
- Change “Attendance was checked” button from red to green to mark all students present or mark the individual absent students.
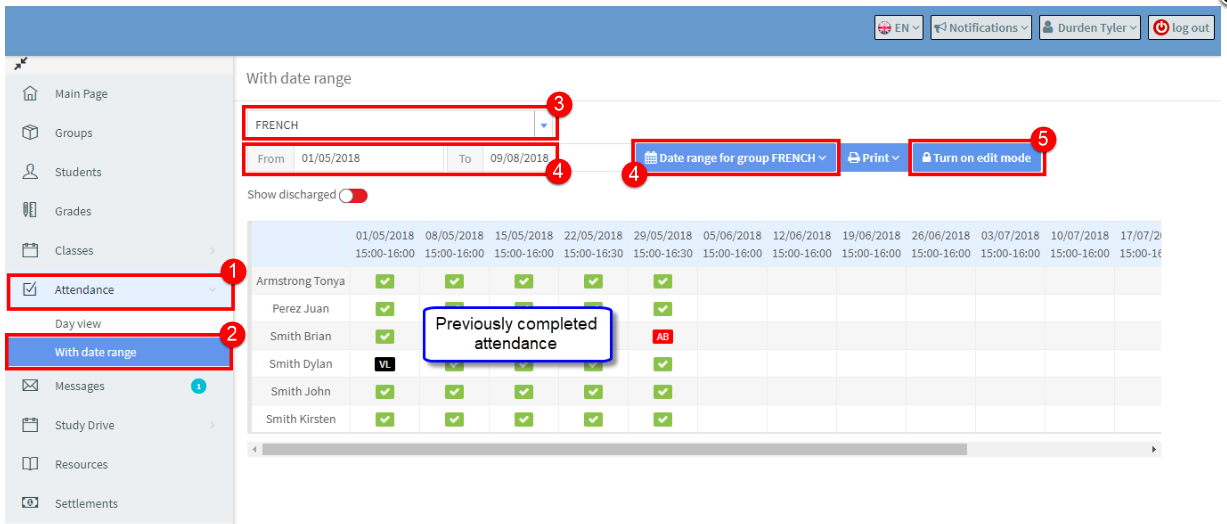
If you want to mark a range of dates:
- Go to Attendance.
- Select “With date range.”
- Select the Group you want to mark.
- Change the date displayed if you want.
- Click “Turn on edit mode”.
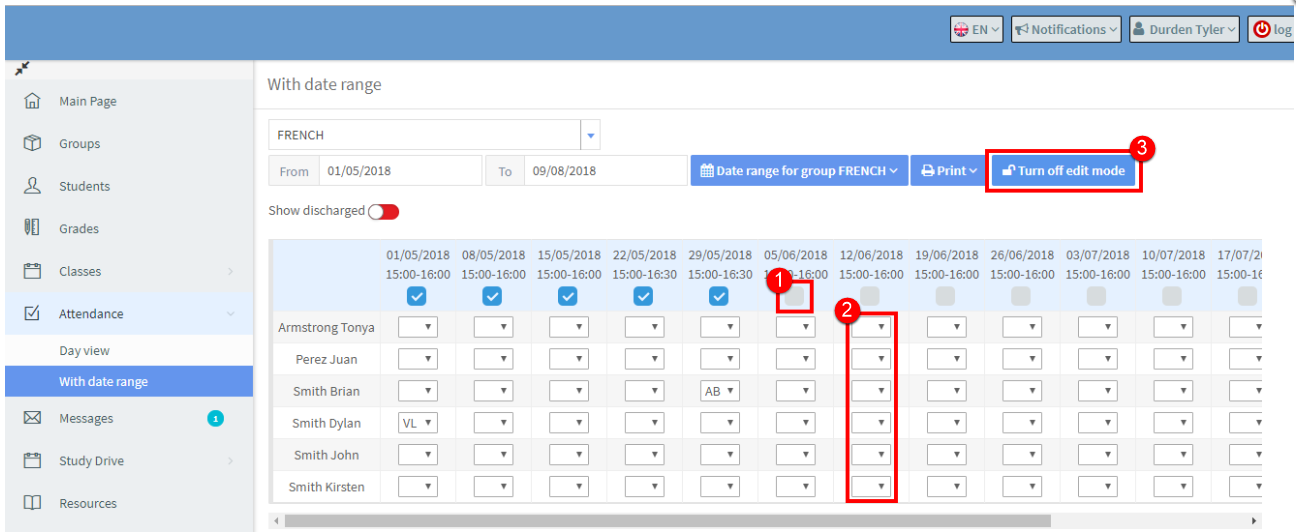
After you click “Turn on edit mode”:
- Click at the top to mark all students present, or
- Click on a drop-down to mark student absent.
- Remember to “Turn off edit mode”.
Registers for Attendance – if you click on the Print button:

You can print out registers for the group;
- Standard – has the date and time of lesson for students to sign.
- Advanced – has everything about the group and lessons, including attendance for past lessons.
- Advanced – empty – has everything about the group and lessons, but not the attendance for past lessons.
You can change the time period of the registers printed by first changing the date range for the group (see above).