In this type of the settlement, the beginning point is the price of the course. Depending on the arrangements with the student, you can divide the price of the course into instalments by assigning a payment plan or apply discounts to the price.
How to bill a student for all classes?
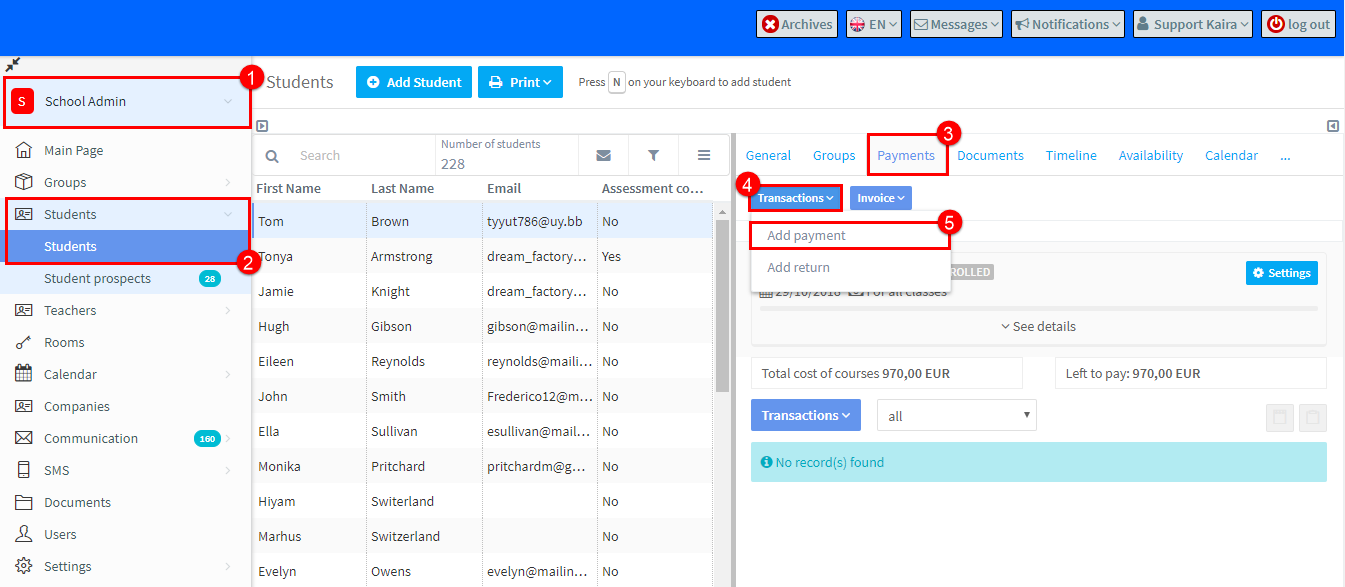
- Go to School Admin.
- Go to Students.
- Click on the student’s Payments Card.
- Click Transactions.
- Select “Add payment” from the drop-down.
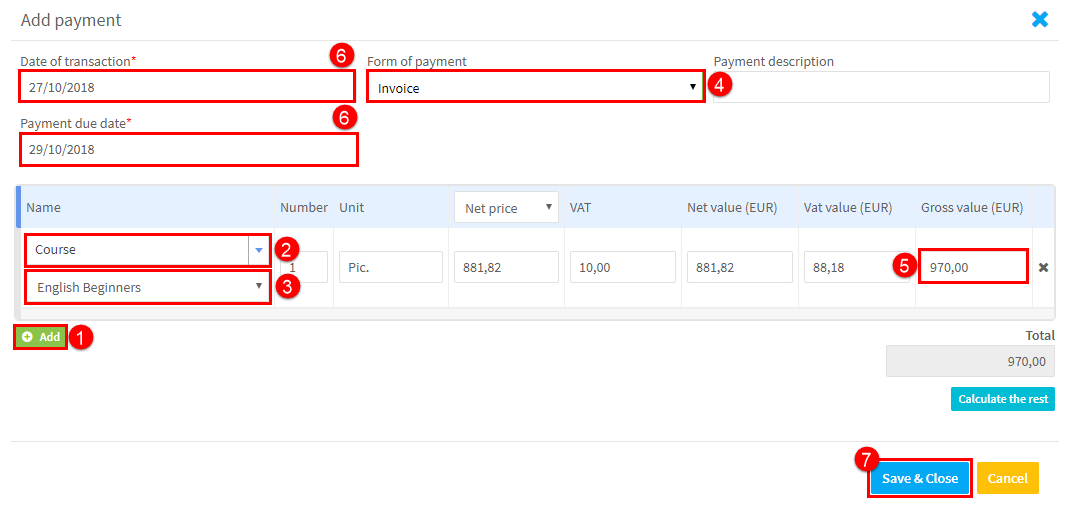
A new card will appear:
- Click Add.
- Select the type of item that the payment is for.
- If the student has more than one course, you will need to select the right course. Multiple items: courses, books etc., can be paid for at once.
- Select the Payment Type.
- Enter the amount being paid.
- Check the dates are correct.
- When finished click Save & Close.

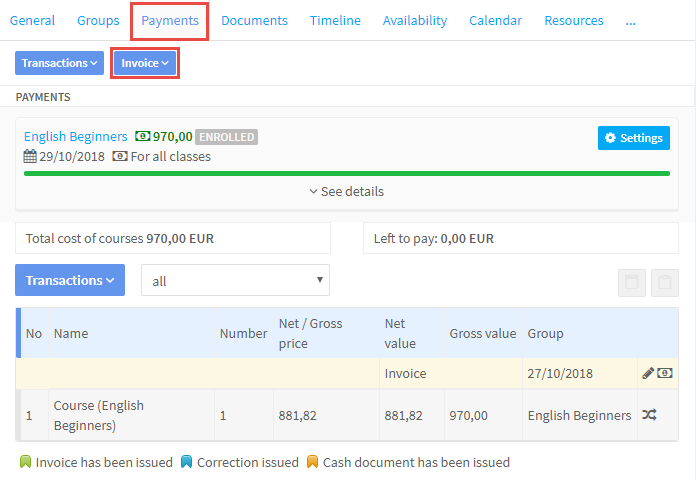
Now that a transaction has been created an invoice, if required, can be issued.
- Click invoice and three options will appear:
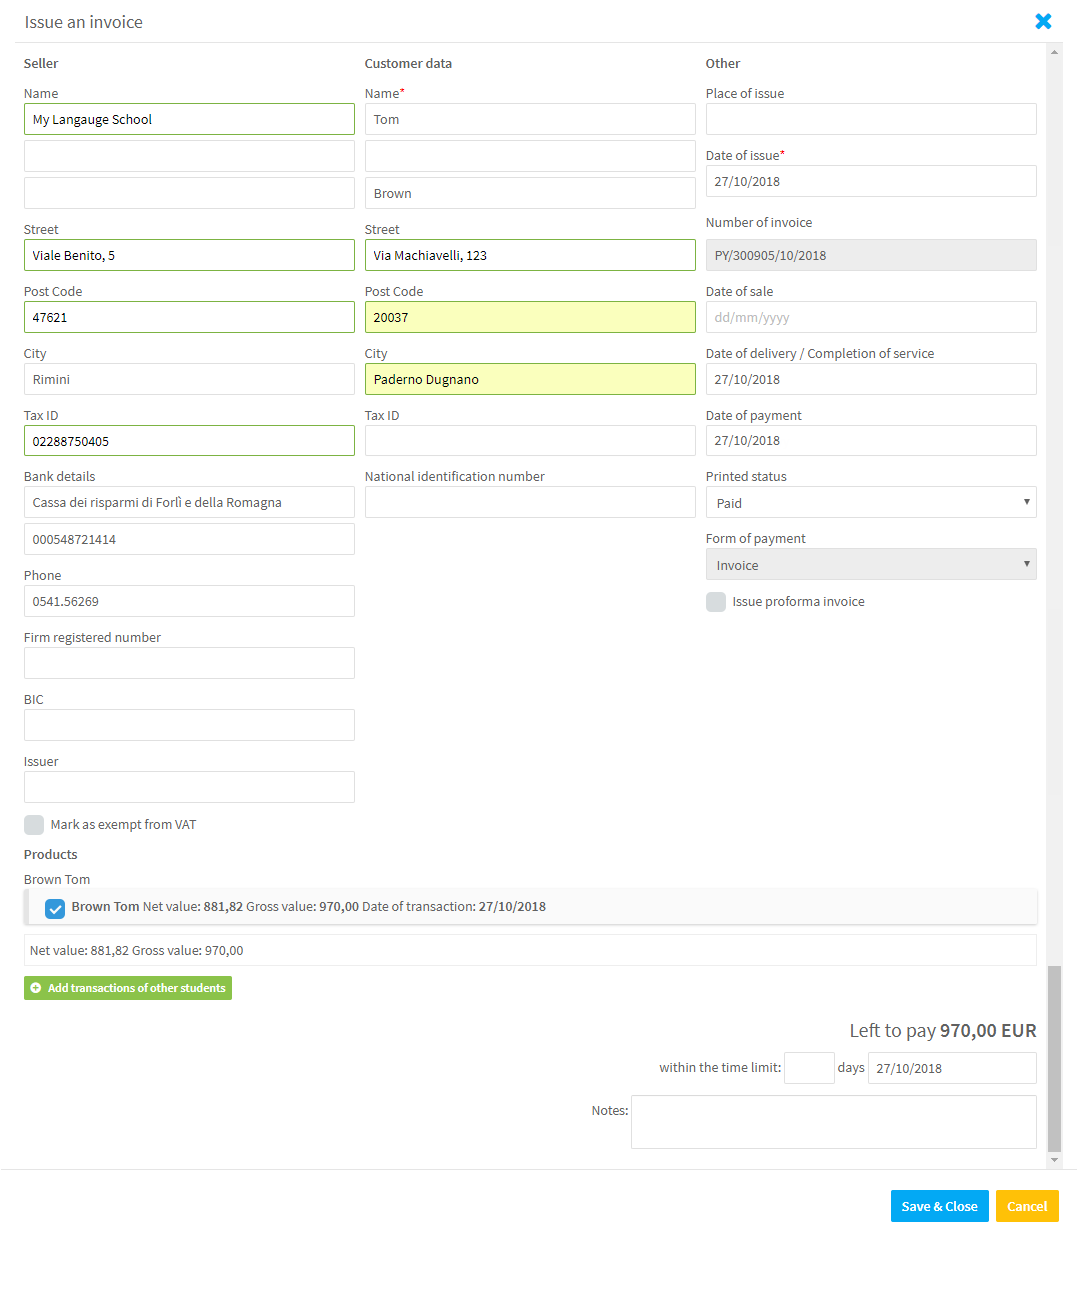
- Issue an invoice.
- Issue an invoice based on VAT margin. (an invoice including VAT)
- Issue an invoice without VAT (an invoice stating that VAT is not payable on the items.)
After you make your selection choose the same form of payment that was assigned to the transaction and select that type of transaction. Also, set the correct invoice status on the printout: “To be paid” or “Paid”. Then, click “Save & close”.