
Finance Settings:
This is where you enter a number of the basic items that will be used in the creation of invoices, instalment plans, discounts etc.,
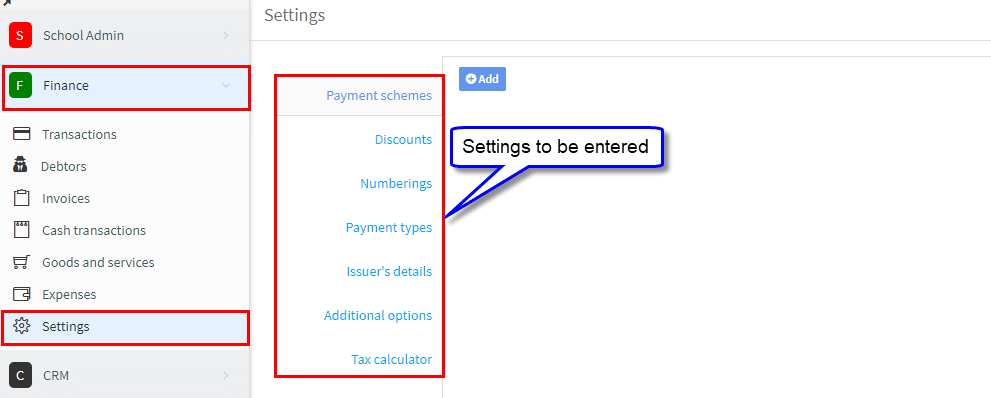
Payment Schemes:
A payment scheme is a schedule of payments for a student to make to pay for their course. There are two ways you can create a payment scheme:
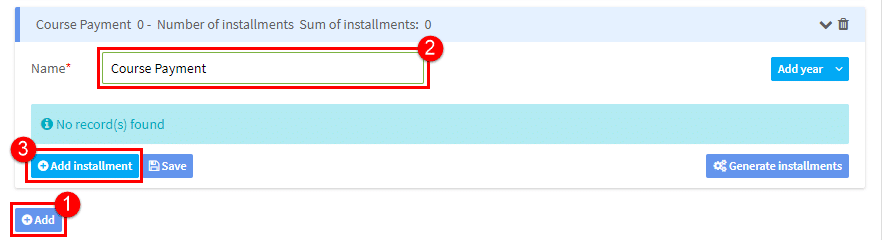
♦ Create Payment Scheme Installment by Installment:
This might be best if you have irregular payment dates and/or amounts.
- Click “Add”.
- Name the scheme.
- Click “Add installment”.
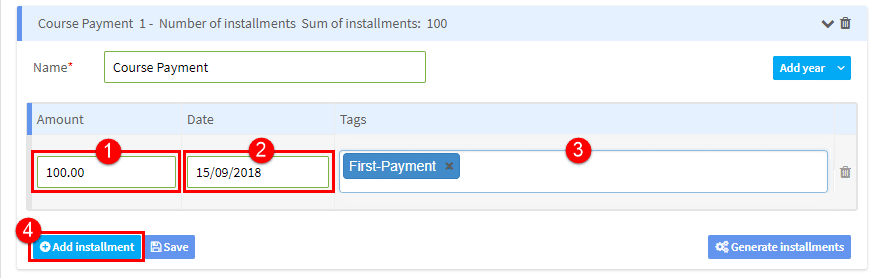
We now need to create the installments:
- Put the amount of that installment.
- Put the date it is due.
- You can give the installment a name.
- Click to add another installment.
Continue until you have added all the installments click Save:
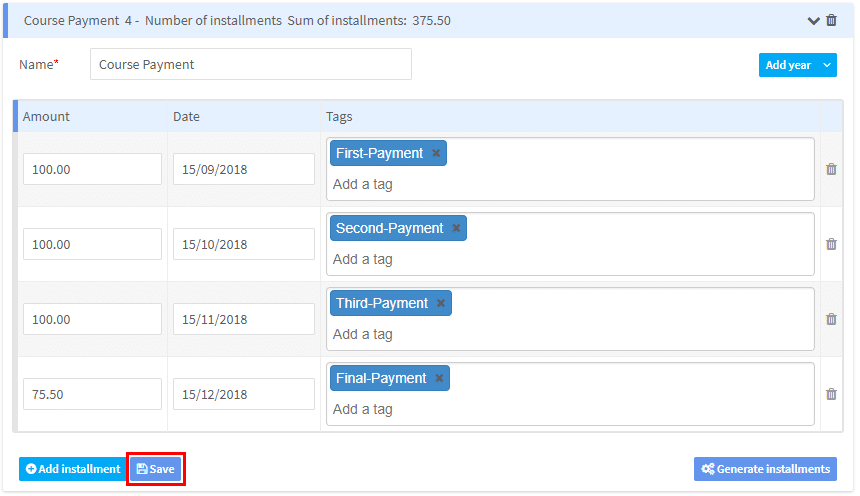
and you will see your Payment Scheme listed:

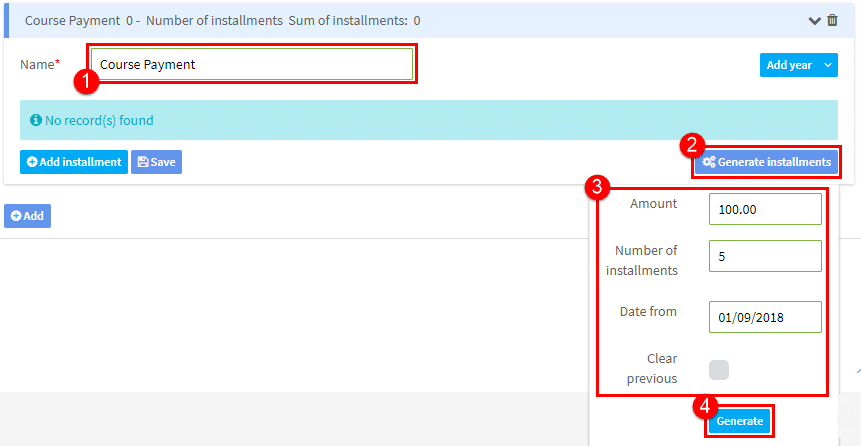
♦ Create Scheme using Generate Installment Button:
With this method we do not use the “Add Installment” button:
-
- Name the scheme.
- Click “Generate installments”.
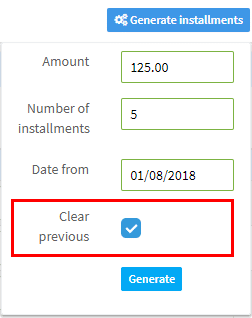
- Fill in installment details, note the Amount to be put here is the TOTAL due.
- Click “Generate”.
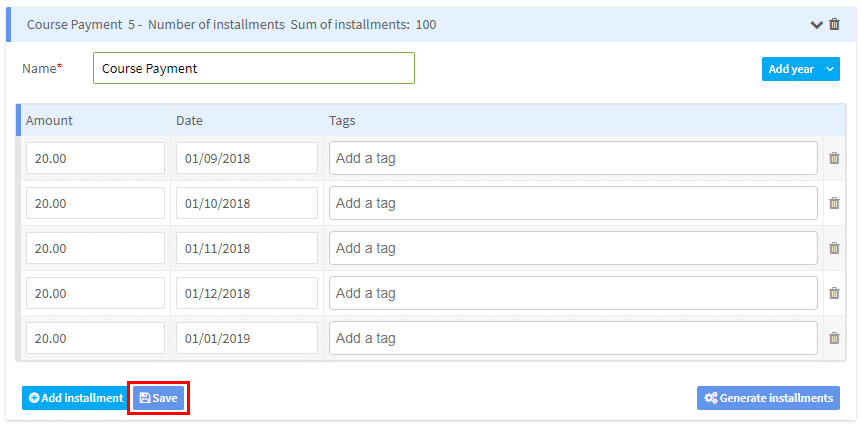
The payment scheme will appear:
- You can alter the amounts, the total, the dates due and add tags.
- When you have finished click “Save”.
♦ Other ways of Creating a Payment Scheme:
There are two other items that can be used in creating a payment scheme and that is where you update an existing one. This is particularly useful if you are starting a new school term or year; you can update an existing scheme.
- Add Year Button – if you want to reuse an existing payment scheme, just select the period you want to add:
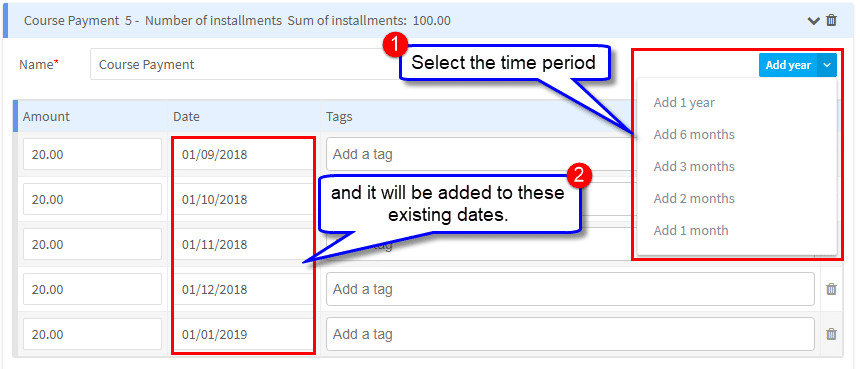
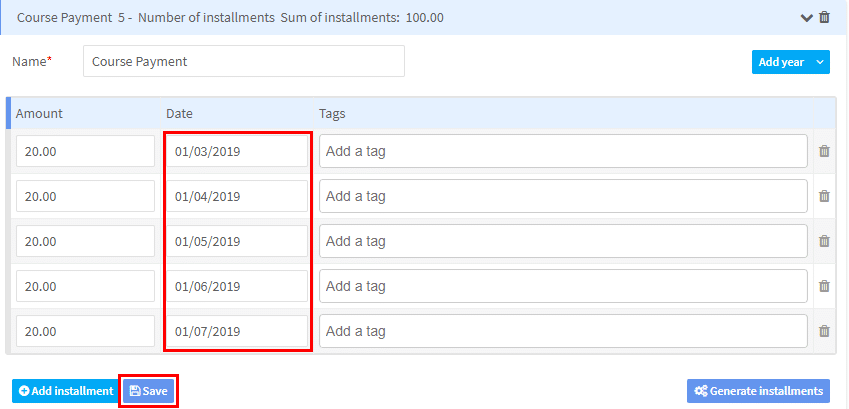
Choosing the 6 month option would change the above to:
2. Generate Installments – Clear Previous: this is again to overwrite an existing payment scheme that you want to reuse. Clicking this option will delete any installments the payment scheme already has.
Discounts:
In these Settings we create discounts that can be applied to students’ tuition fees.
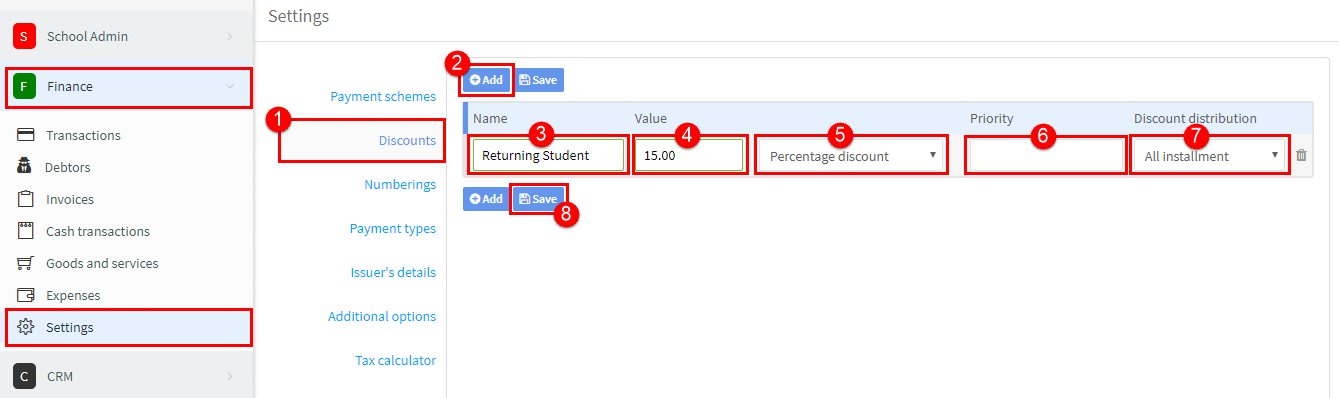
- Go to “Discounts”.
- Click “Add”.
- Give the discount a name.
- Put the amount of the discount.
- There are two options here: Percentage discount in which case the amount in 4. would be 15%, or in which case the amount would be 15 Euros, or whatever currency your school has in its Settings.
- When you have a number of discounts that can be applied to a booking this tells the system the order in which to apply them as this can affect the final total of all discounts given.
- Discount distribution, there are number of options as to where the discount can be applied, they are:
- All Installments – the discount value is divided between all the installments.
- First Installment – the discount value is applied to only the first installment.
- Last Installment – the discount value is applied to only the final installment.
- From each Installment – the discount value is applied to every installment.
- Hourly Rate – the discount value is applied to the hourly rate of each students’ lesson.
8. When you have finished creating discounts click Save
Numberings:
The Numbering Settings allows you to create the numbering scheme you want to apply to our financial documents and contracts. You will not be able to create these documents until a numbering scheme has been created for them.
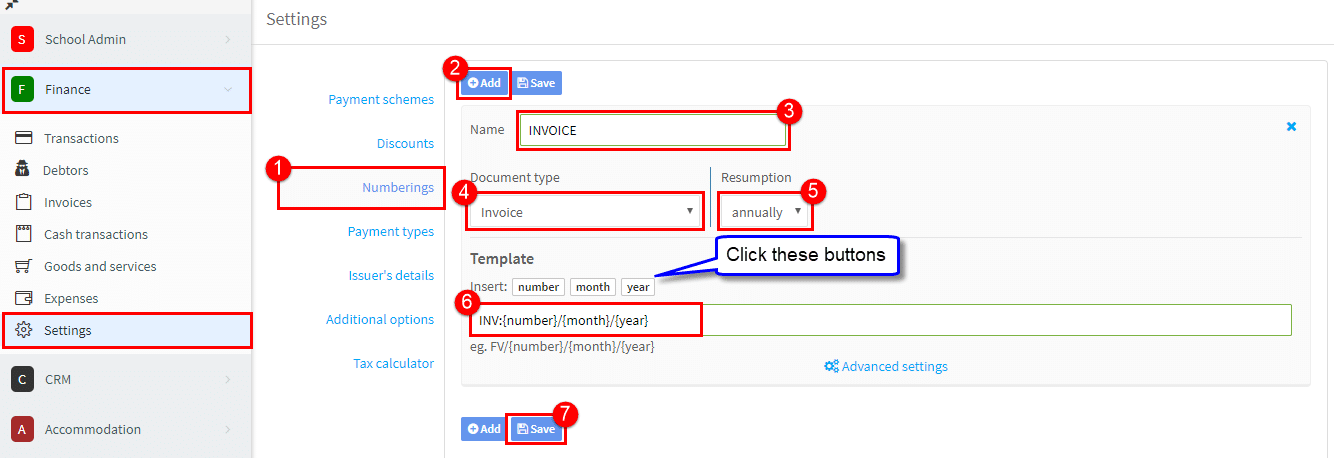
- Go to “Numberings”.
- Click “Add”.
- Give a name to the document for which you are going to create a numbering scheme.
- Select the document type.
- Select when you would like the document number to restart at 1. ( see Advanced Settings below)
- Create a numbering format for the document. To create the format click on the variables: “number”, “month” and “year”. They will then appear in the template field. You can change the order of the variables by changing the order in which they are clicked. You can separate the variables with forwardslashes and add a prefix i.e: INV: {number}/{month}/{year}.
- When you have finished click “Save”.
♦ Advanced Settings:
In this section we tell the system what to use in the numbering format.
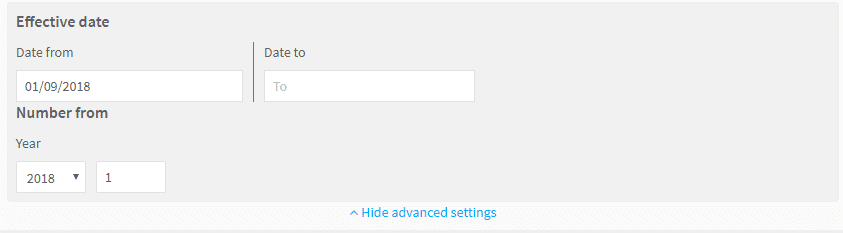
If you selected annually for the Resumption of the number in 5 above, you will see the following:
- Date from – which date will you start using the document.
- Date to – when will you finish using the document. If you leave it blank it will continue
- Year – what year should be inserted into the number format. You will need to change this at the year end.
- Number – what number do you want to start issuing documents from. If you are switching over to SchoolMate, you may have existing numbers that you need to follow on from.
If you selected monthly for the Resumption of the number in 5 above, you will see the following:
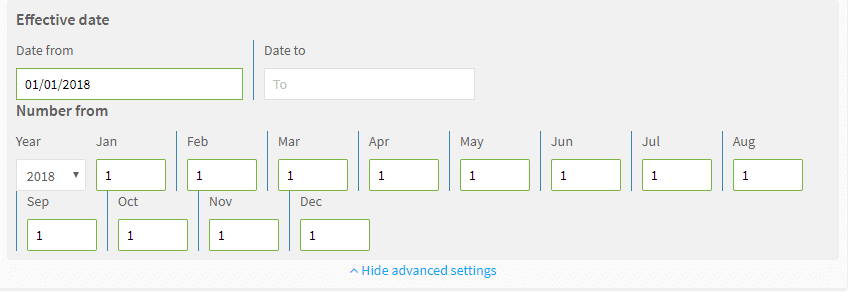
The principal is the same as outlined in annual resumption.
Payment Types:
This is where we enter the types of payment methods the school accepts:
- Click “Add”.
- Put in the type of payment: transfer, credit card etc.,
- Is payment received when the document is created or later? A bank transfer and cash are not deferred payments but an invoice with a period to pay is deferred.
- Will the payment go into the cash register? If so select one of the two options: transaction or invoice, this means you will be able to produce a document for the cash payment.
- Click “Save”.

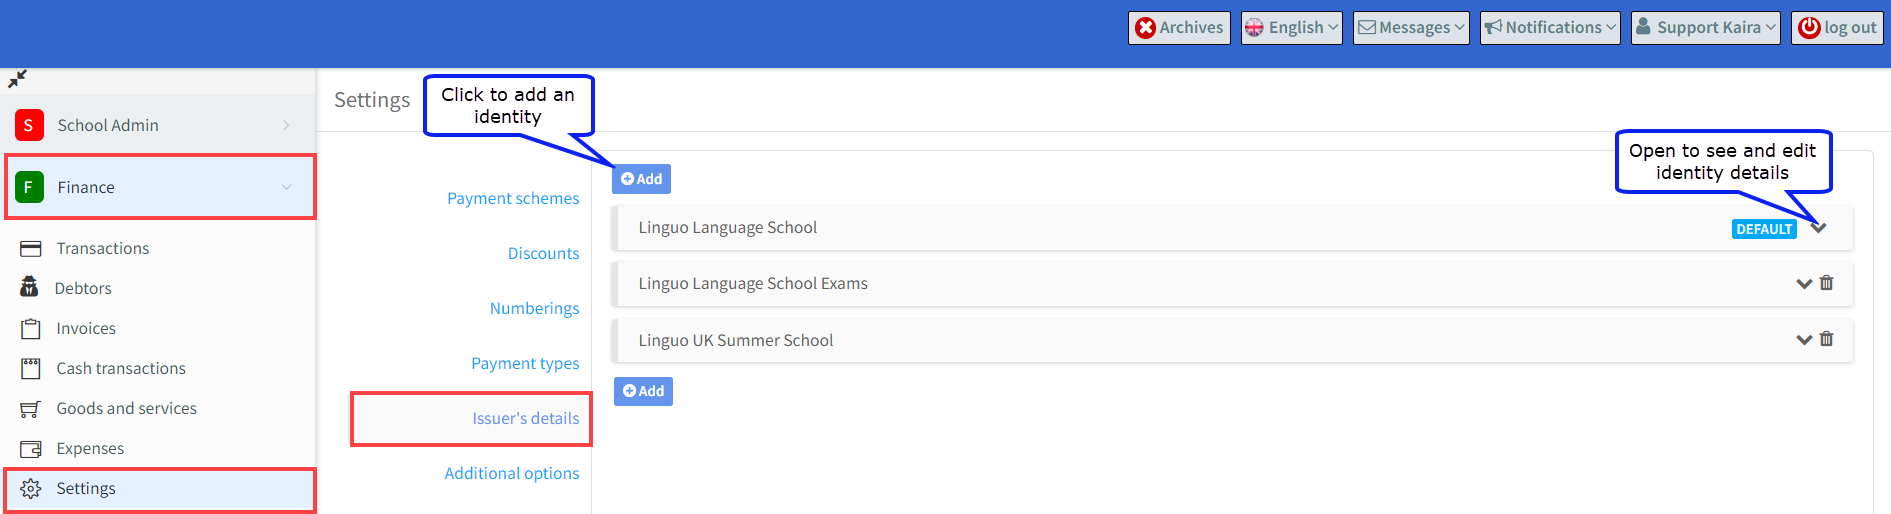
Issuer’s Details:
If you want your details to appear automatically on receipts, invoices etc., enter your details here. As some business services that schools perform attract VAT, for example, and others don’t. Schools often have different financial identities that they need to issue documents through. If you have “Allow multiple invoice details” switched on in Miscellaneous Settings – See 12 above -, you will be able to select the business identity that you wish to add numbering schemes for.
Additional Options:
In this section you have the option to configure supplementary features. They are as follows:
- Currency – this is entered when your account is created.
- Print two copies of the cash document on one page – click to enable.
- Automatic sending of invoices/cash documents to the user’s email address – after ticking this option the financial documents will be automatically emailed.
- E-mail notification about upcoming payments – if you want to send students an automatic reminder that they have a scheduled payment due, enable this item. Also, enter the number of days before the date of the scheduled payment that you want the email reminder sent.
- Notice of unpaid installment – if you want to send a reminder to students that a scheduled payment has not been paid, enable this item. Also, enter the number of days after the date of the scheduled payment that you want the email reminder sent.
- Contents of email sent with invoice or cash document – This message will be automatically sent with your financial documents.
- Email address of payment administrator – This address will appear in the sender field of the financial document.
- Billing information displayed to students – This is displayed to students over payment details.
- Add the latest cash document number to the transaction – the number of any cash document will be printed on the invoice additionally
- Automatically attach information on VAT exemption – click this and the text below will appear on invoices etc., by default.
- Default information on VAT exemption – this is the VAT text that will appear.
- Hide transactions relating to archived users – Archived students transactions will be placed in the archive. To view them, simply enable the archive view.
- Force student’s data on the automatically generated cash transaction – If you want to have the cash documents showing the student’s data rather than the parent’s, tick this box.
- Hide payments menu item in student’s view – If you do not want your students to see their payments tick this box.
- Hide transaction information on the automatically generated cash document – If you do not want to print transaction descriptions on cash documents, tick this box.
- Discount from the original price of the course – tick this box to tell the system to calculate discounts on the original course price.
- The maximum value discount – enter the maximum value that can be given as a discount.
- The maximum percentage discount – enter the maximum percent that can be given as a discount.
- Default invoice’s time limit (in Days) – The system automatically enters this number of days to the date the invoice is created to give a Payment Due Date, but you can change that on the actual invoice if you want. This is used with deferred invoices.
- Add detailed information about the course on the invoice – more detailed information about the course can be added to the invoice via this option.
Remember to click “Save” after resetting the options.
Tax Calculator:
Enter the standard rate of employee tax here. This is useful if there is a standard rate for self-employed teachers you have to deduct contributions for.