
The student’s card Payment Tab is divided into three sections:
- Where payments and invoices etc., are created. You can find full details about that here.
- Details of the students finances relating to the group. We look at this in detail below.
- Lists of transactions made via 1 above appear here.
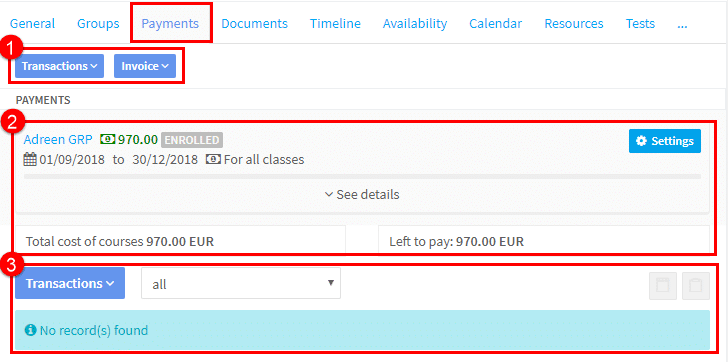
Transaction Section:
Payments can be added and invoices created for individual students on their card. There is a full explanation on adding payments etc., in the Finance Module here.
Payment Section:
We will now look at this is more detail:
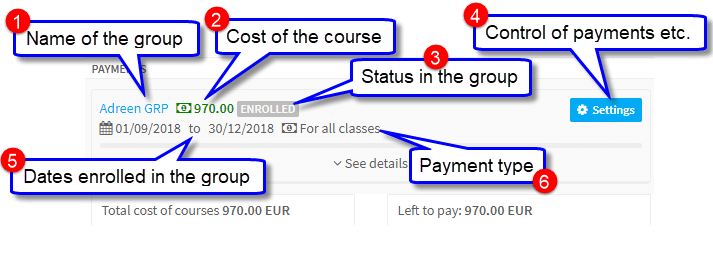
- Taken from the group card.
- The cost of the course is displayed here if the payment type in 6 is “For all classes”. There are 3 payment types possible: “For all classes”, “Hourly in arrears” and “Hourly in advance” If the payment type is changed to an hourly one, the cost of the course is not displayed.
- There are possible statuses (depending on your system settings) “Enrolled”, “Reservation” and “Awaiting”. These are controlled by the Students Tab on the group card.
- The Settings button controls payments schemes, discounts etc., We will look at that in more detail below.
- The dates that the student is enrolled in the group.
- The way in which the student will pay for lessons. This is filled by default from the Settlement Type that is chosen when creating the group.
Payment Details
If we click “See details” in the Payment section, we can then start to apply discounts, payment schemes etc.,

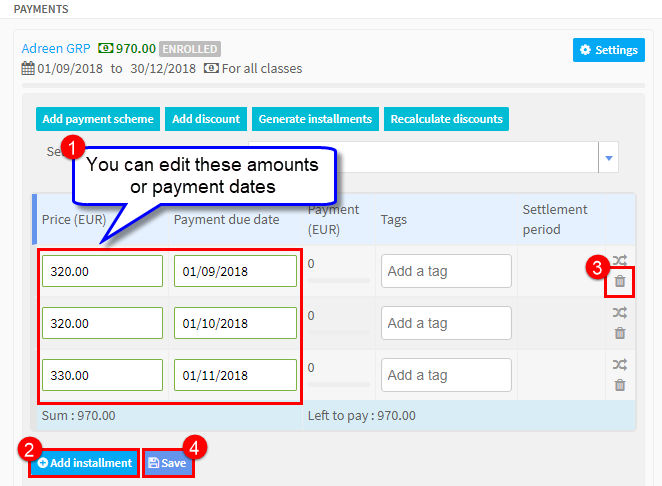
Here is the expanded Payments section:

Adding a Payment Scheme to a course:
- We can add a payment scheme for the cost of the course. How to create payment schemes are explained in the Finance Module here.
- Click “Add payment scheme”.
- Select the payment scheme you want from the drop-down list.
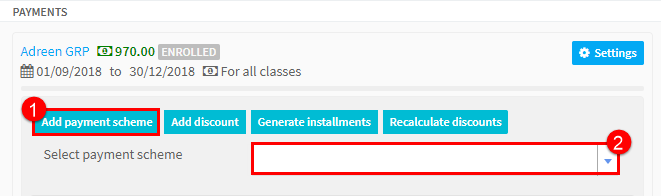
- This payment scheme will then be applied to the cost of the course:
- You can edit the installments.
- Add an installment(s).
- Delete an installment.
- When finished click “Save”.
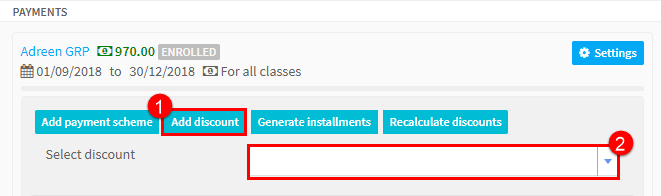
Adding a Discount to a Course:
- We can add a discount to the cost of the course. How to create discounts are explained in the Finance Module here.
- Click “Add discount”.
- Select the discount you want from the drop-down list.
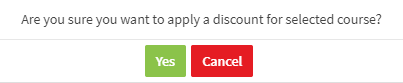
- You will be asked a number of questions; select Yes.

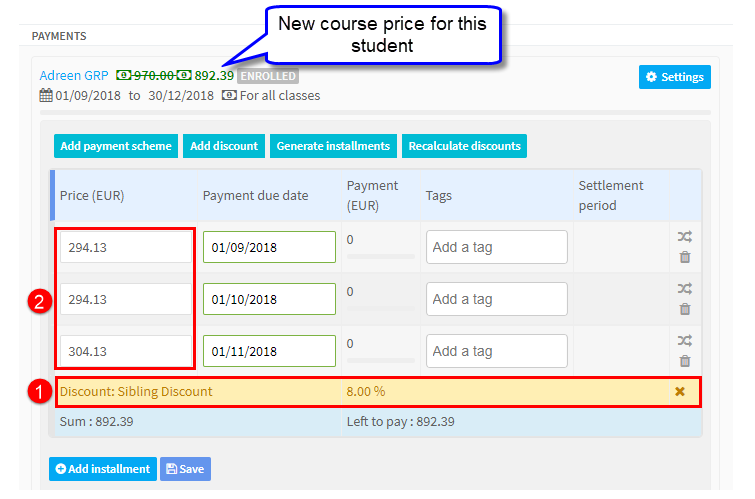
- This discount will the be applied to the cost of the course.
- The name of the discount and percentage.
- The new amounts due.
Generate Installments:
This button allows you to create a one-off installment plan just for this student. You can find out how to here.