With this feature you can easily create a test and share it with your teachers and students. If you use the registration module, you can attach the test as a placement test on the registration form. The test can consist of a variety of questions – single choice, multiple choice, gap fill, predefined responses, and may include open questions and you can even insert a YouTube video.
How to create a test:
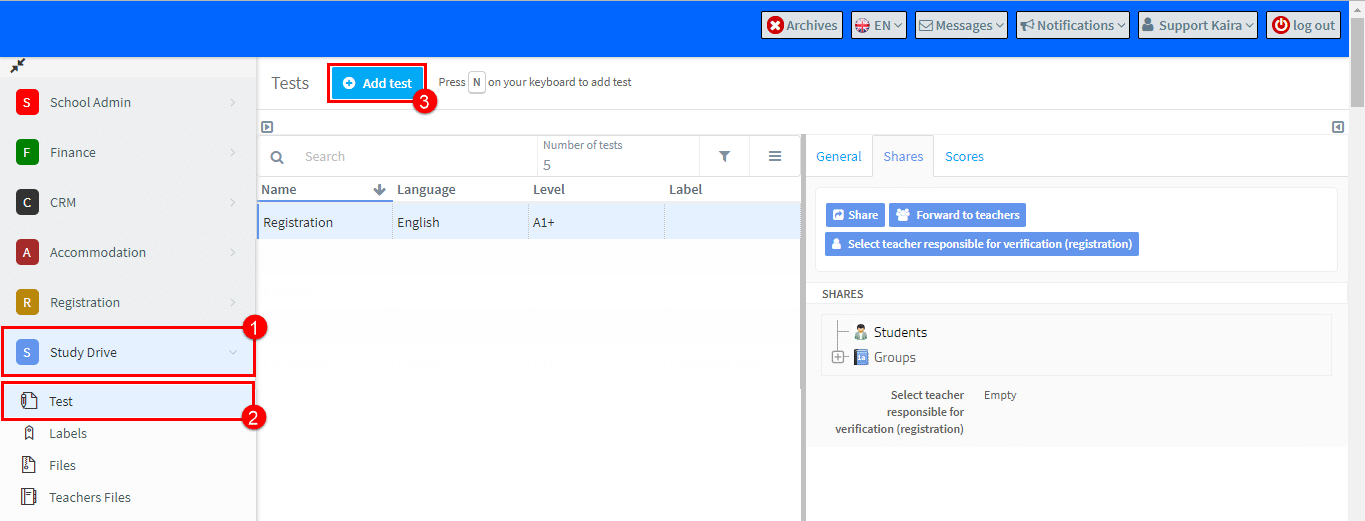
- Click on Study Drive.
- Click on Test.
- Click on Add test.
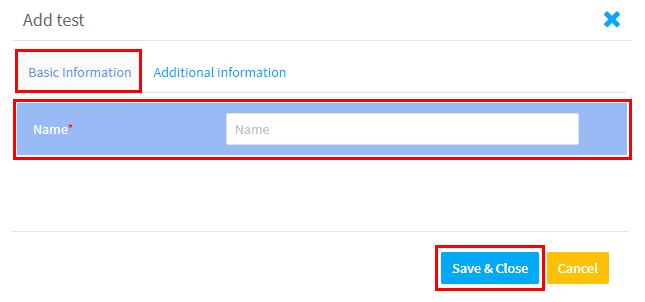
Basic Information:
After clicking “Add test” the following will appear. On the Basic Information card give the test a name and click Save & Close.
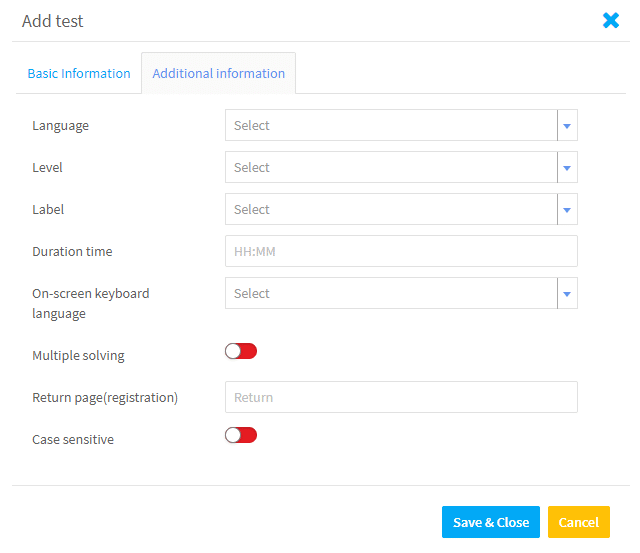
Additional Information:
On the Additional Information card you will need to select:
- The language for which the test is for.
- The level of the test.
- Select a label or name for the test. These are created in Study Drive here.
- Set how long the student has to complete the test.
- Select what keyboard language is to be used. If your test is in a language that has accents, umlauts etc., this is important.
- Click green to allow the ability to solve the test multiple times.
- Enter the return page the test taker will be sent to after completing the test. This is connected to the Registration Module.
- Decide whether upper and lower case letters should be taken into account when checking the answer.
Adding Questions to the Test:
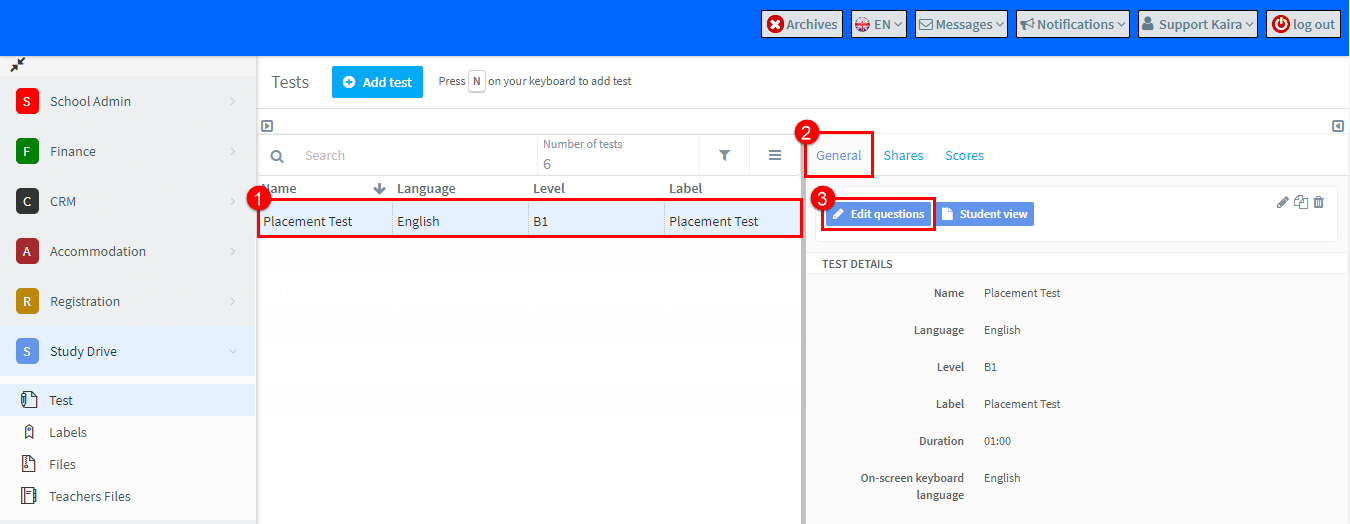
- Click on the test you want to create questions for.
- Click on the General Card.
- Click Edit questions.
When you have done that that the following will appear:

From here we can add text, videos, files and create questions about them.
Block of text:
Here we can add text that will appear in the test:
- Add your text.
- Click Save.

Question Types:
There are 5 types of questions that can be created when you click on the “Add question” button, we will look at each type below:
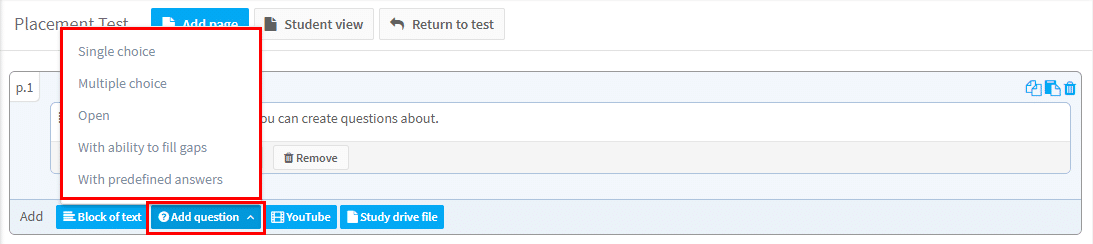
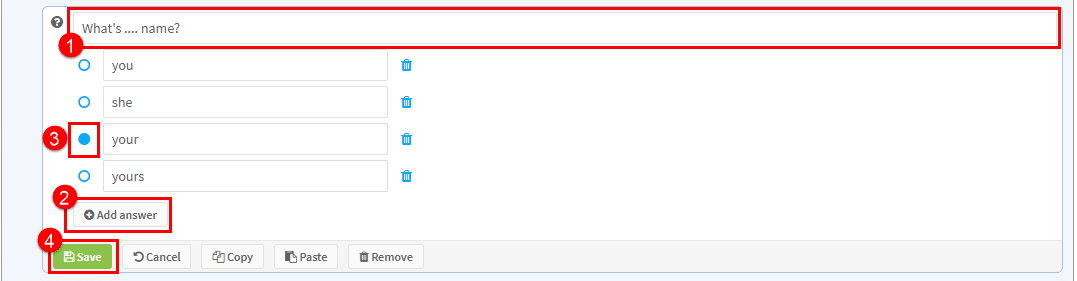
- Single Choice – only one correct answer is possible.
- Add the question.
- Click to Add an answer.
- Mark the correct answer.
- Save.
- Multiple Choice – more than one answer is possible.
- Add the question.
- Click to Add an answer.
- Mark the correct answer
- Save.

Open:
This type of question gives the student a place to enter text.
- Put question.
- Enter the maximum number of points for the question. This will be used by the teacher marking the test.
- Click Save

With ability to fill gaps:
There are two types of tests that can be created here:
- Write the question.
- Highlight the word.
- Click Mark expression:

This is what the student will see when they take the test and the student can type in the missing word:

The second is as follows:
- Write the question.
- Tick Choice of words from list.
- Highlight a word.
- Click Mark expression. Repeat for each word:

This is what the student will see when they take the test and the student can select the words from the drop-down menu: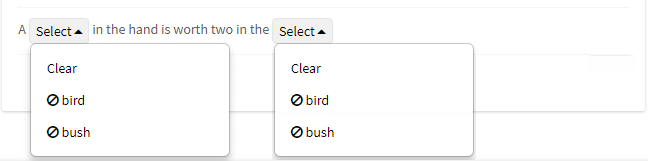
With predefined answers:
In the first step:
- Write the question.
- Highlight the word.
- Click Mark expression:

The highlighted word will change as follows:

Click the plus sign to add other options and remember to mark one as the correct answer:

The Test Card
After you have created your test there are a number of things you can do depending on the tab you are using.
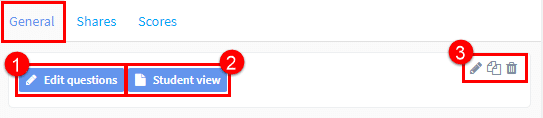
General Tab:
- Edit questions – this will change, delete or add questions.
- Student view – here you can see the test as a student does.
- Icons – Edit the test details, Make a duplicate of the test and Delete the test
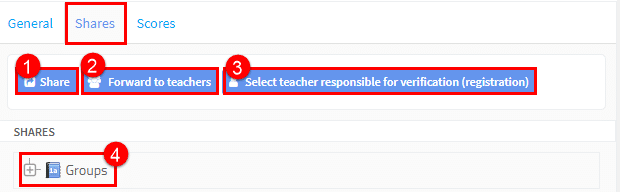
Shares Tab:
- Share – If you click shares, a list of all your groups will appear. If you select a group, the test will be placed in each students’ Study Drive. If you select a lesson of the group, the test will be placed in each students’ Study Drive and attached to the chosen date’s lesson.
- Forward to teachers – this will place the test in the chosen teacher’s Study Drive. They will be able to edit it and share it with the students in their groups.
- Select teacher – here you can chose a teacher responsible for checking the completed tests. This will place the test in the chosen teachers’ Study Drive.
- Shares – If you expand this, it will show the groups that have been sent this test and the lesson date if applicable.
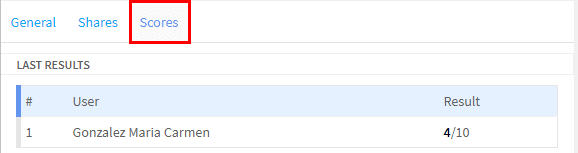
Scores Tab:
This shows the results of all students who have taken the test: