
There are a number of ways that you can give access details to students, parents and teachers from their cards. There is a tutorial on that here.
Sending Access Details in Bulk:
To do this we will use the email feature in SchoolMate. Therefore, you will need to have your students’ and parents’ email addresses on their card. Secondly, you will need to have input your school’s email settings into your SchoolMate account. You can find out more about that here.
Token Values:
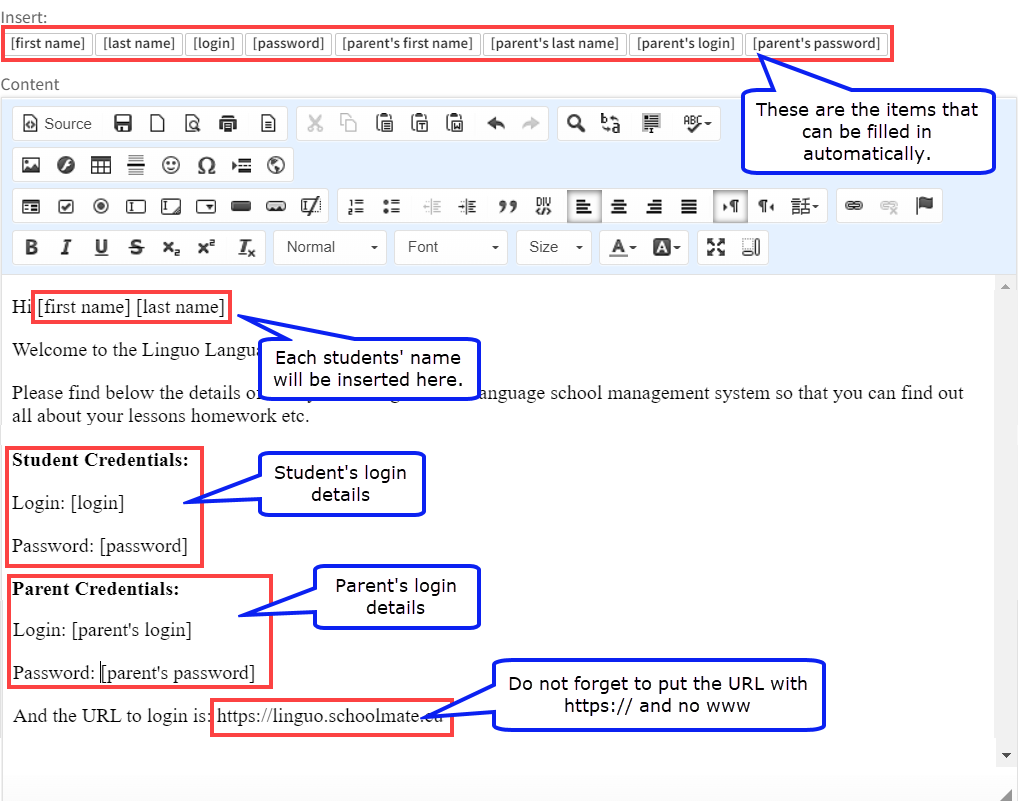
Token values allow you to automatically personalise each email with individual student and parent details. They look like this:
![]()
You only need to use the parents’ token values if you are going to send an email to both the student and the parent at the same time. In that case, it would look like this:
and this is what the student will receive:
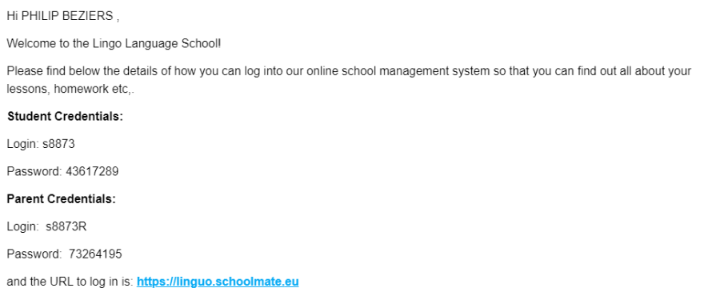
As you can see, you can send emails to students and in one email, but if there is no parent listed in the system for the student the parents’ details section would be empty. Therefore, it is recommended to send login details to students and parents in separate emails.
The token values to send login details to students and parents in separate emails are the same:
Log in: [login]
Password: [password]
You can see that the token values are the same in both cases. This is because the email is only being sent to one person type – student or parent.
Email Templates:
If you are going to be sending out login details on a regular basis, you might want to create an email template.
Where to send emails from:
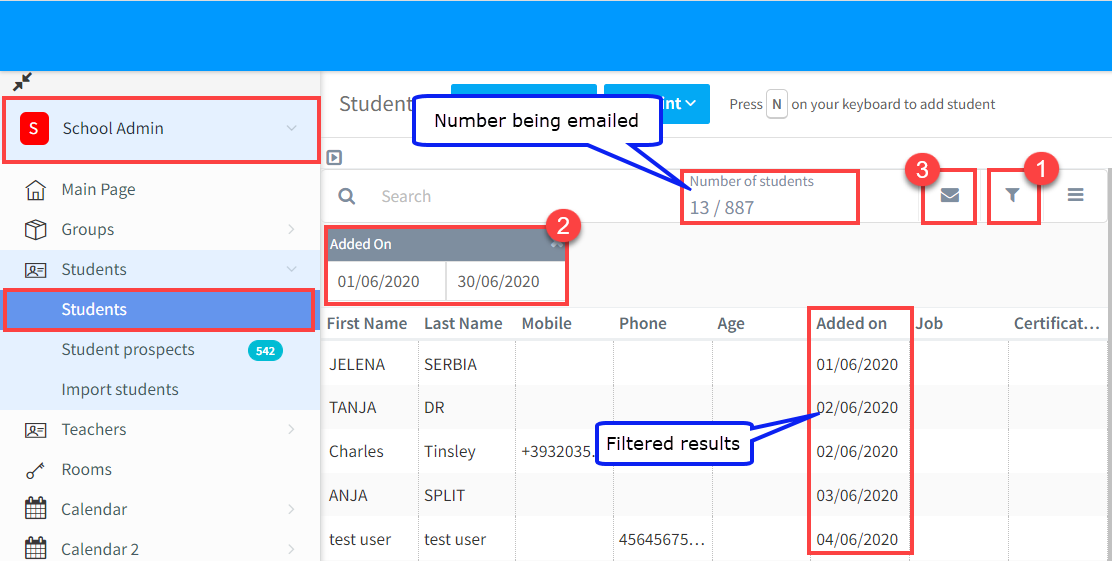
You can send access details from a number of places in SchoolMate, but the problem with these is that you cannot filter between new students, and students who have already received their access details. The best place to send is from the students list, because when they are added to the system, they are given an “Added on” date. So, you can filter for new students and then send access details only to them and their parents.
Go to School Admin – Students:
- Open the filter options.
- Add the dates that you want to search for students by.
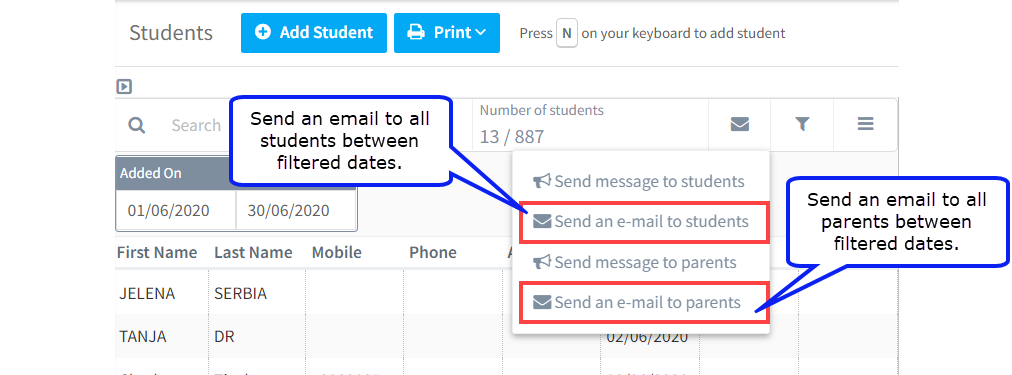
- Click the email button and select “Send an email to students”.
Once you click on 3 (above) you can then select either students or parents:
Special Points:
- Student Prospects; the date that they were added to the system doesn’t change when they are converted to students. So a student, who was once a Student Prospect, will have as their “Added On” date, the date when they were created as a Prospect.
- Make sure that you select the correct type of email type that you are sending or your emails will not be delivered. This is explained in a tutorial here.