
Teachers and Time Tracking
What is Time Tracking?
Some European Union countries labour laws require schools to keep accurate daily records of working hours. Teachers must be able to review and confirm their hours each month.
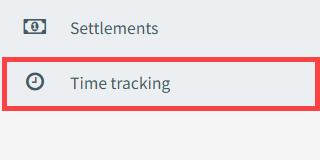
If your school uses this feature in SchoolMate, you will see a new menu item when you log in:
Viewing your hours:
Monthly records of your working hours, breaks and absences are created by School Administrators. Once they have created them you will be able to see them when you click the Time Tracking menu item.
- These teaching hours are automatically taken from your teaching calendar in SchoolMate.
- Non-teaching hours, breaks and absences are added by you the teacher (see below).
- Each row represents a month, with its current status (Waiting, Approved, or Rejected).
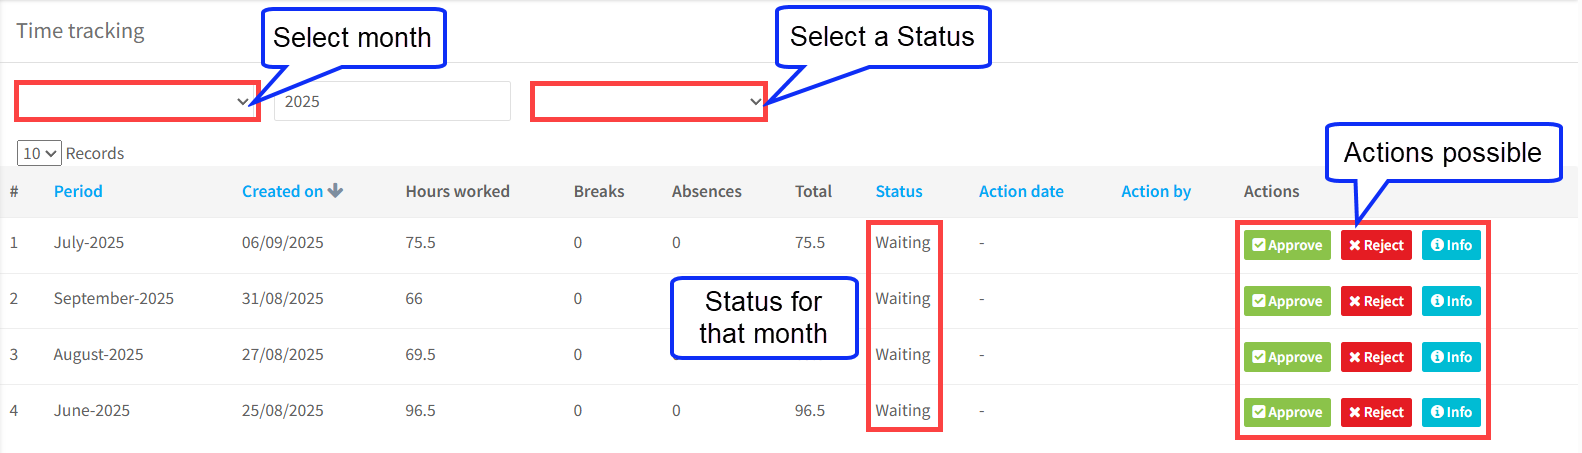
Actions Possible:
There are three possible actions:
. 1. Info:
- Click on this and a breakdown of every lesson, break and absence in the month will be downloaded.
You have two options from this point.
. 2. Approve:
- Click Approve if the breakdown is correct.
- The month’s status changes from Waiting → Approved.
- You will automatically receive a confirmation email confirming that you have approved the hours for the month.
. 3. Reject:
- Click Reject if you find an error in the breakdown.
- The status changes from Waiting → Rejected.
- You will automatically receive an email confirming the rejection.
- If you reject, please inform your School Administrator so they can correct the data and regenerate the report.
⚠️ Important: Once you approve or reject, the action is irreversible. A confirmation pop-up will appear before finalizing.

Status:
Each month can have one of the following statuses:
- Waiting – You have not yet approved or rejected the report.
- Approved – You confirmed the hours, and a confirmation email has been sent.
- Rejected – You disagreed with the breakdown. The month is cancelled, and administrators may need to make corrections.
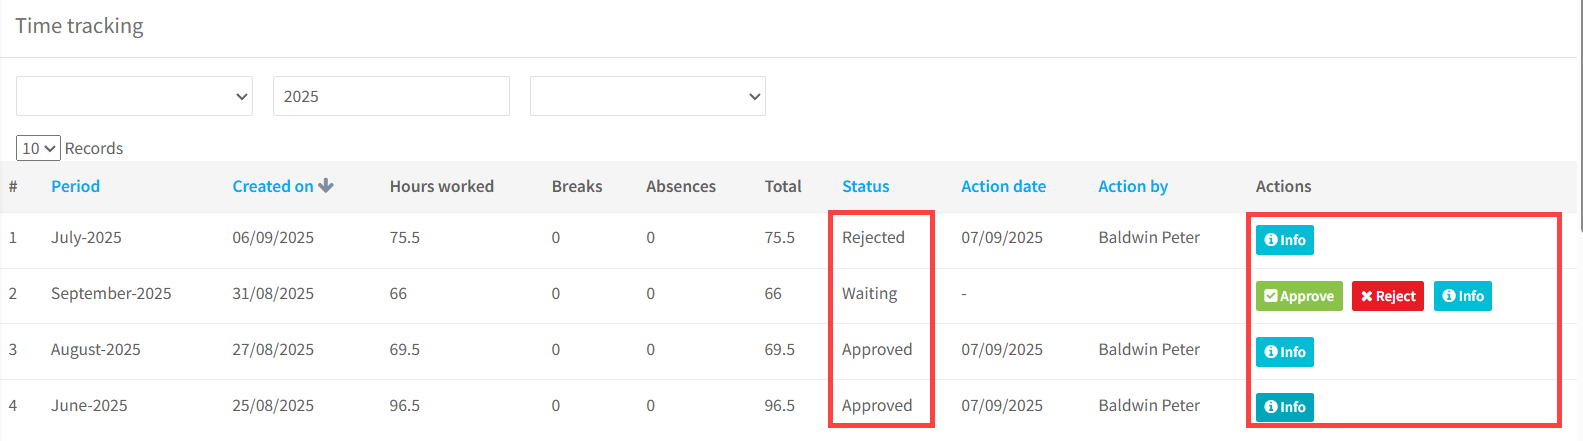
Here is what the above time tracking page looks like after some approvals and rejections:
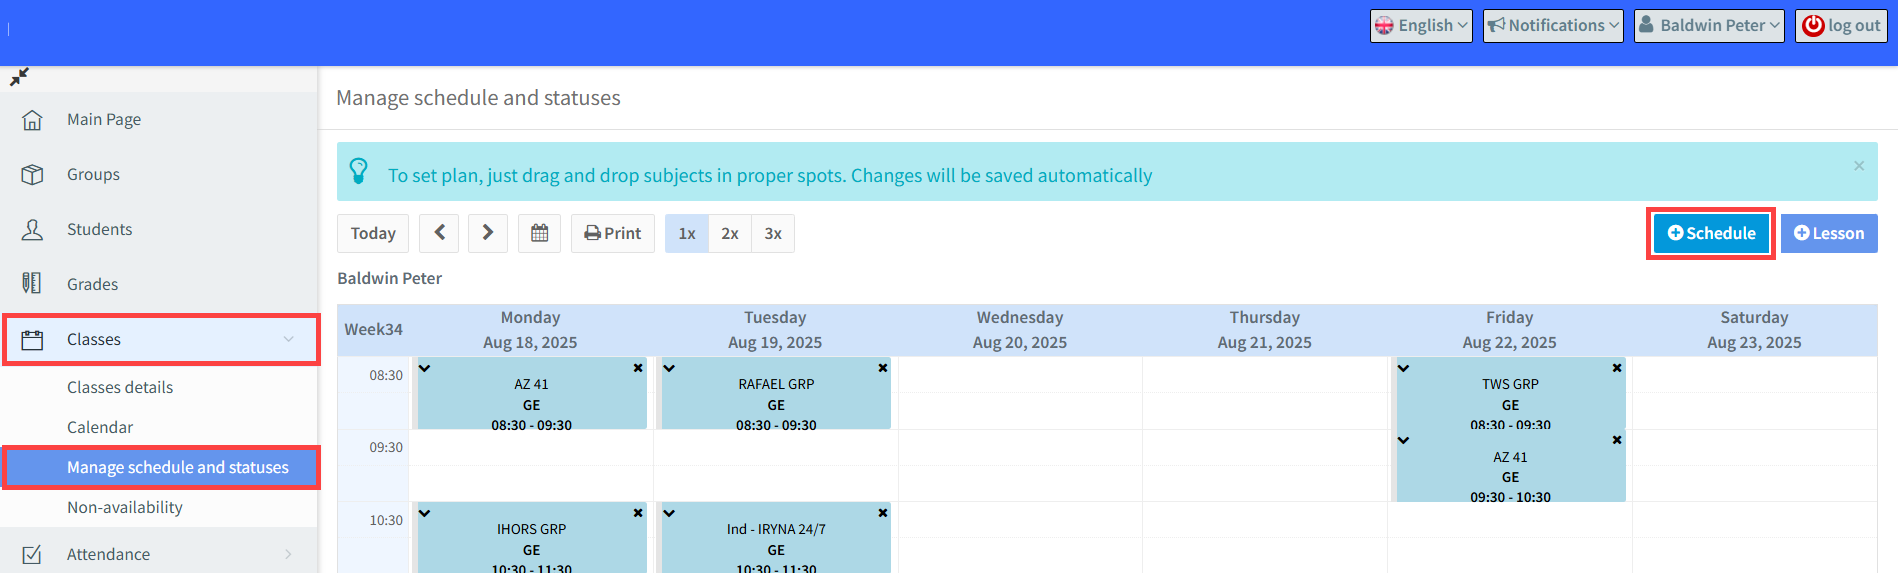
Non-Teaching Hours:
As mentioned above, the monthly record of teaching hours is taken directly from your teaching calendar in SchoolMate. So, if there are mistakes in your teaching hours, they will need to be corrected first in your teaching calendar.
If you also perform non-teaching academic work (e.g., observations, interviews, meetings), you can add these hours yourself. It is also possible to add breaks and absences from work.
Go to Classes – Manage schedule and statuses – Schedule in the menu:
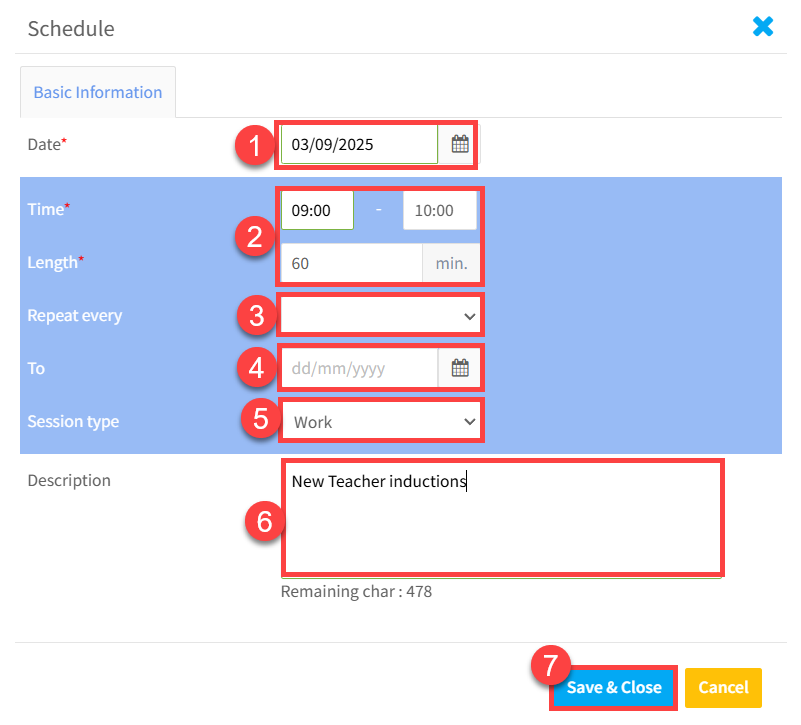
When you click on the “Schedule” button, the following will appear:
- Put the date of the item you want to add. This can also be the start date if it is a repeating item.
- Put the start and end time.
- If it is a repeating item, put the frequency. It can be weekly, every two weeks or every four weeks.
- If it is a repeating item, put the end date.
- Select what time of item it is. The options are work (non-teaching), break – (lunch etc.), absence (Holiday, illness etc.). If you are adding an absence, you will also need to select whether it is a paid or unpaid absence.
- Here you can put more information about the item.
- “Save & Close”.
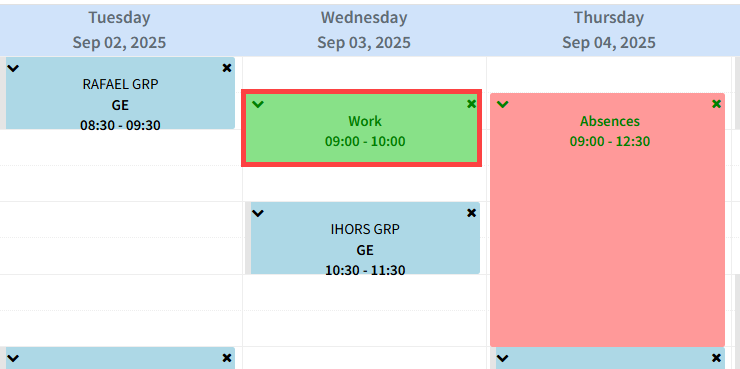
The new item will then appear in your schedule:
Editing Non-Teaching Hours:
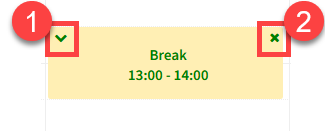
Once you have added some non-teaching items, you may need to make changes:
-
Edit a non-teaching item
- Click the “V” symbol.
- If the item is part of a series, only this specific entry will change.
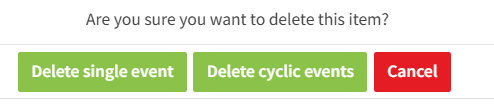
. 2. Delete a non-teaching item
-
- Click the “X” symbol.
- If the item is part of a recurring series, you can choose between:
- Delete single event – removes just that one item.
- Delete cyclical events – removes that item plus all future items in the series.
When deleting a cyclical item this pop-up will appear.
✅ Key Points to Remember
- Always check your monthly hours before approving.
- Once you approve/reject, the action cannot be undone.
- If hours are wrong, reject and notify the School Administrator.
- Add your non-teaching hours manually so they are included in your monthly record.