Group Settings
The items held in Group Settings are used when creating groups. These items often appear in a drop-down when you are creating a Group .
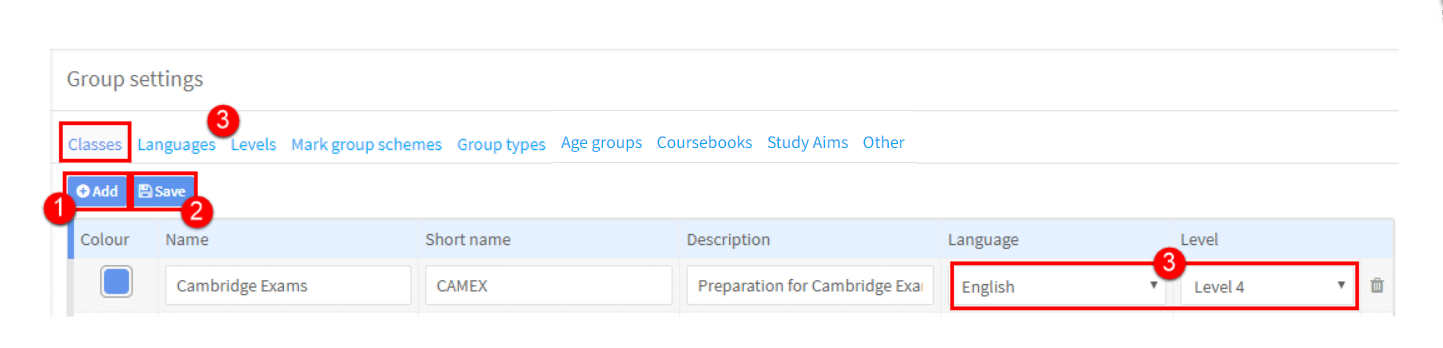
Classes:
This is a way to group lessons of a particular type together i.e. exam classes, young learners, so that you can see all of this type of class together. These are used in Classes Generator.
You can select a colour for each class type. This is used when looking at the calendars, you can ask to see the items displayed according to their class type. The items in the calendar will then change according to the colours you have given them here.
- Click “Add” and fill in the details in the boxes.
- Click “Save”.
- The options in the language and level boxes are held in the language and level cards.
Languages:
Enter the languages you teach here. These appear as options when creating classes, teachers etc.,
- Click “Add” and fill in the language.
- Click “Save”.
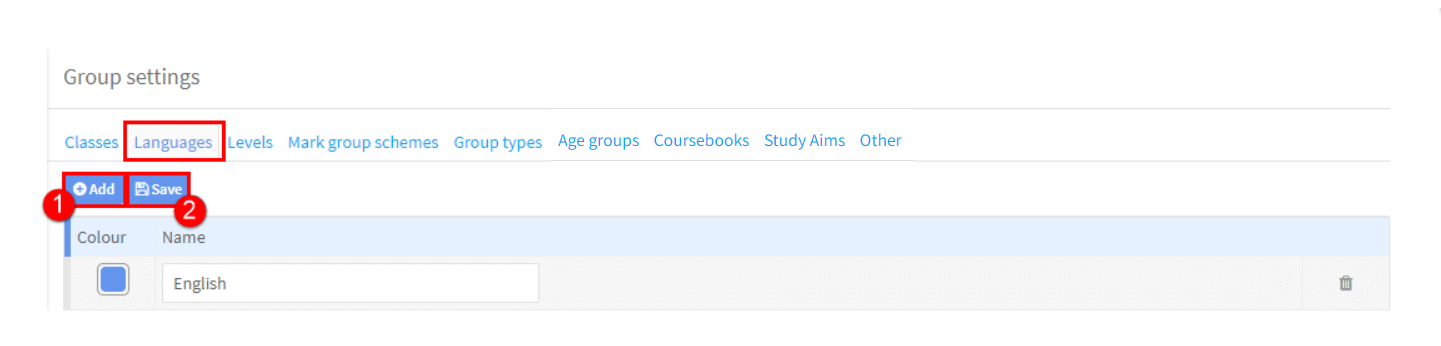
You can select a colour for each language. This is used when looking at the calendars, you can ask to see the items displayed according to their language type. The items in the calendar will then change according to the colours you have given them here.
Levels:
Enter the levels you use to describe your groups here:
- Click “Add” and fill in the level.
- Click “Save”.

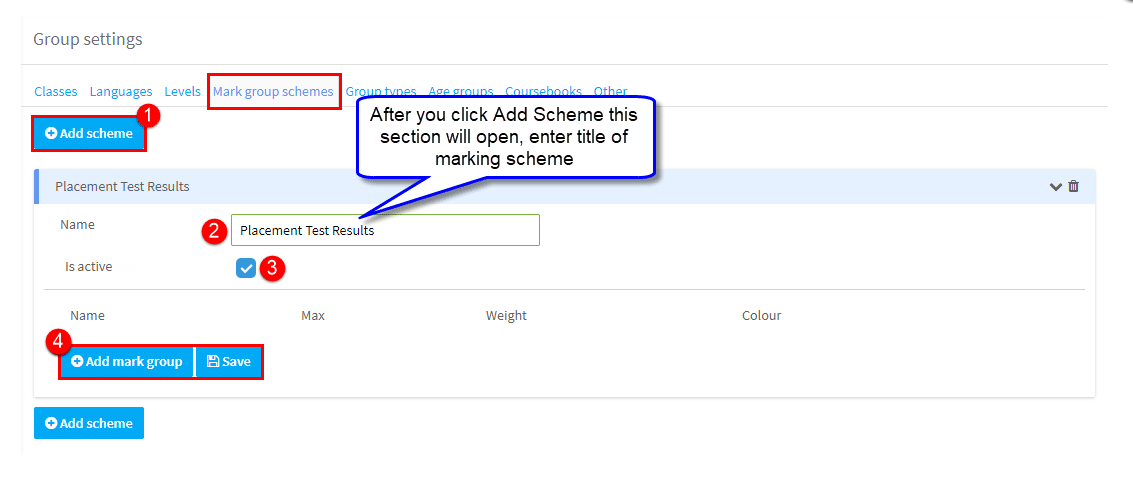
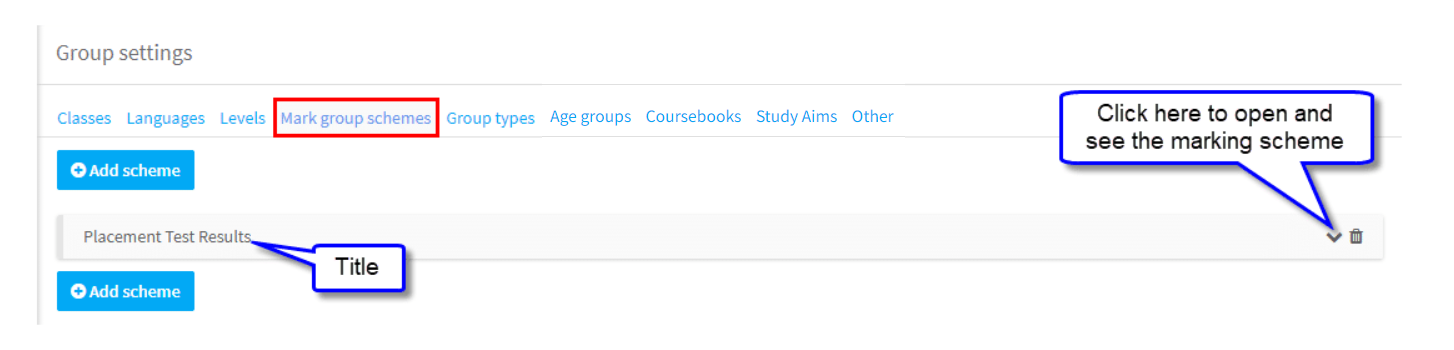
Mark Group Schemes:
These are a way of recording a student’s marks in tests. Typically, you might have start, mid and end of term tests. The subjects that are marked and the weighting of marks is up to you.
- Click “Add scheme”.
- Name the scheme.
- If the scheme is Active, it will appear when adding schemes to groups. If inactive, it will be hidden.
- Click “Add mark group” and add the subjects you want to record results for (see below).
Now we add the subjects, the maximum marks possible and the weight to the overall total
- Click “Add mark group”. This will create a field to hold the test subject.
- Enter the name of the area that the marks will be for.
- Enter the maximum number of marks a student can get in this subject.
- Enter weight you want to give the marks. In the example above all subjects carry equal marks, but if you put a 2 for grammar then in the overall totals grammar marks would twice as much as the other subjects.
- Select the colour you want the subject to have when the teachers fill it in.
- Click “Save”.

After you click “Save” the scheme will be stored and available to be added to groups.
Deleting Mark Group Schemes
If a scheme is no longer used, you can make it inactive as described above. You can also delete a scheme by clicking the trash can icon. If you delete it here, it will remove it, and all marks throughout the system. Alternatively, you can delete it from individual groups on their group card.
If you would like to see where Mark Group Schemes are used in the system, click here.
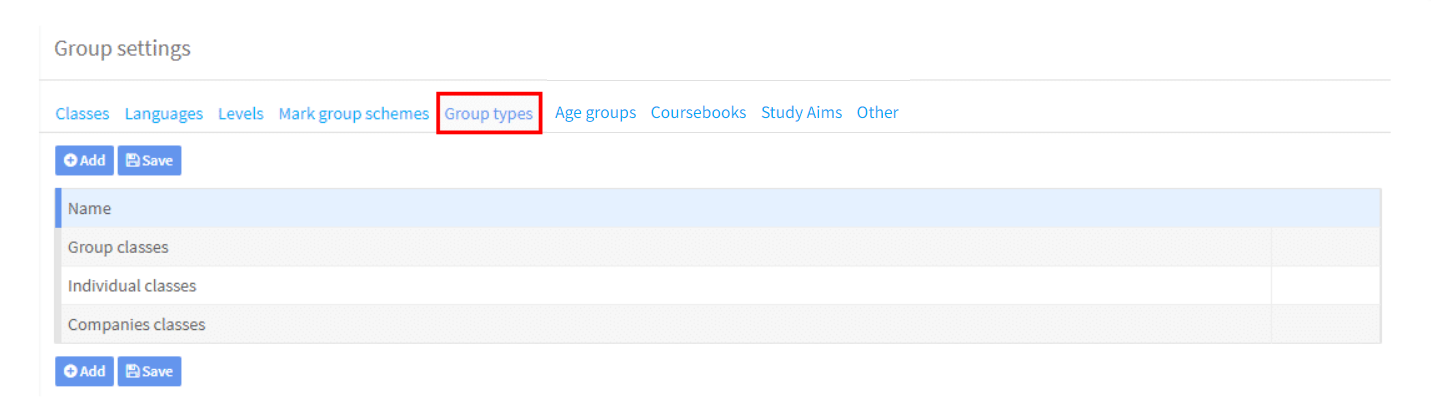
Group Types:
There are three types by default which are enough for most schools. If you want to add more, click “Add” and then “Save”.
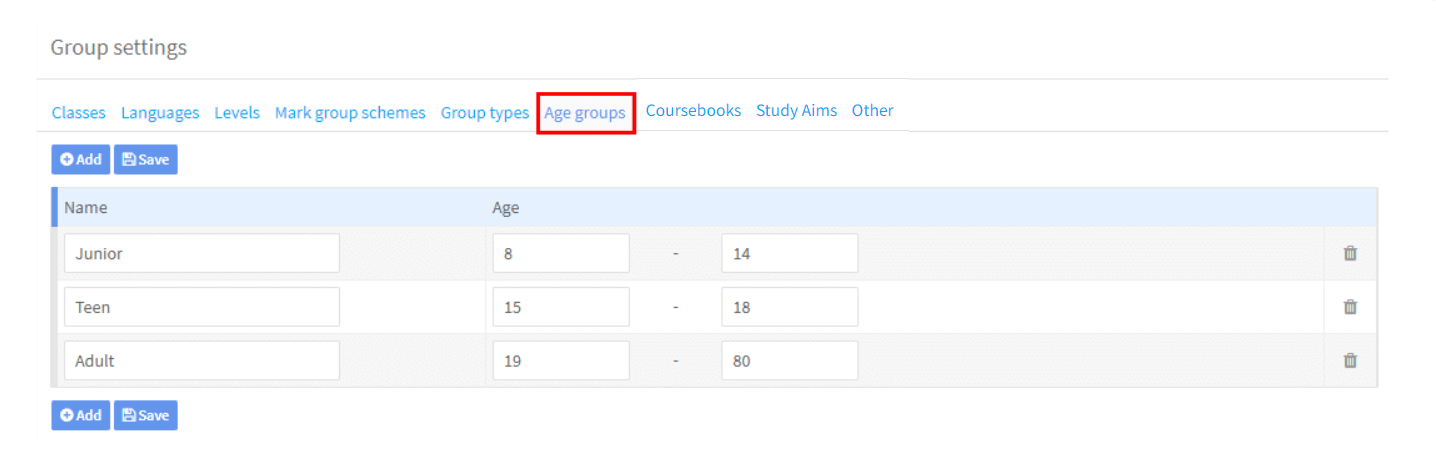
Age Groups:
There are three types by default which are enough for most schools. If you want to add more, click “Add” and then “Save”.
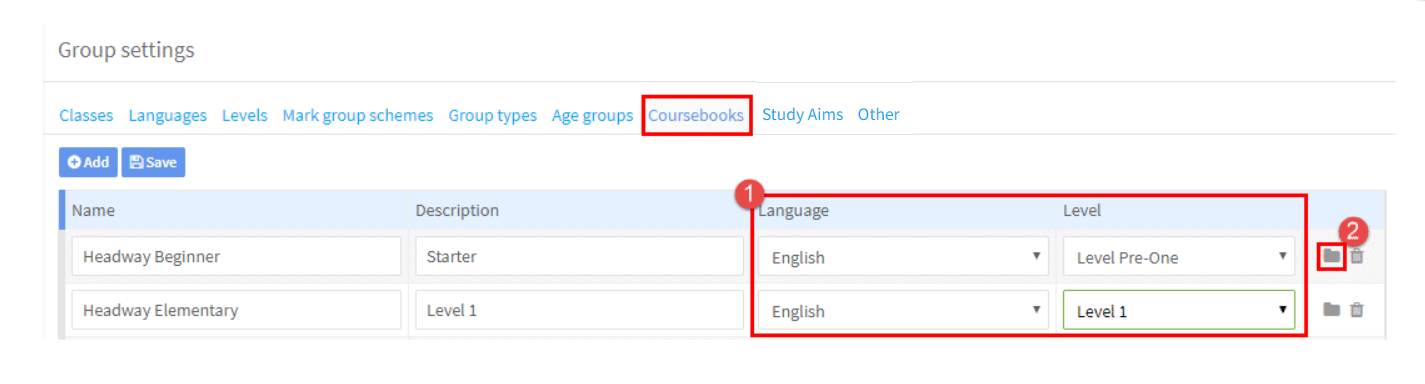
Course Books:
- The items – language and level – in these two drop-downs are explained above.
- This is the Archive button. If a book is no longer in use in your school, you can archive it. This means it will not be selectable when creating a new group, but that records of groups that used it will be kept.
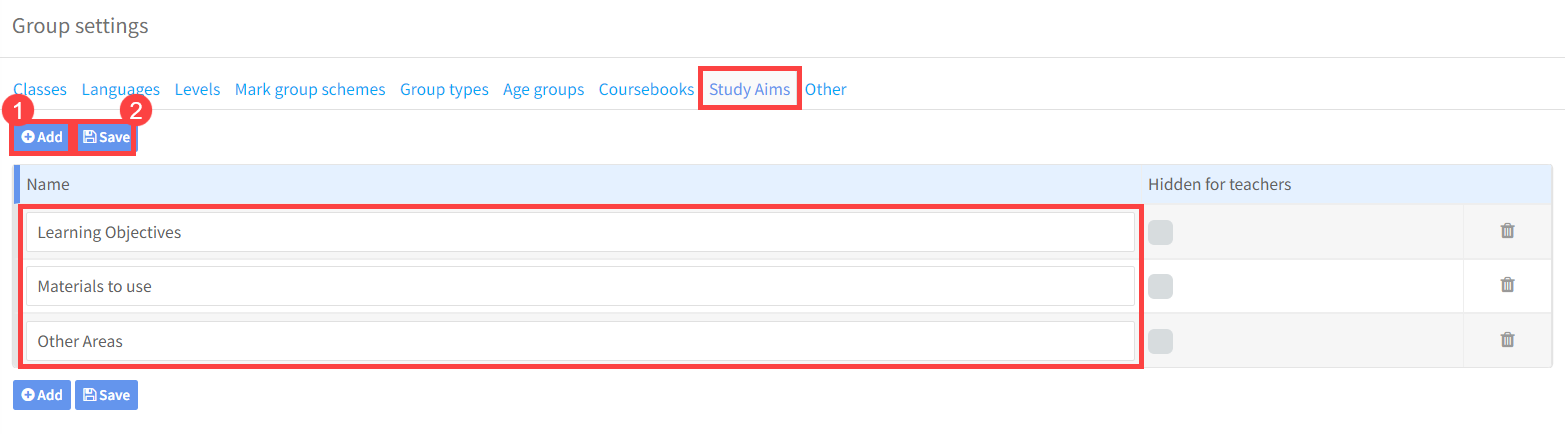
Study Aims:
This is a place where you can add the details of what the group/students want to achieve with their lessons. You can share these details with the group’s teacher so they can see what areas they should focus their teaching on. Teachers can see this data when they log into their SchoolMate account here.
- Click “Add” and study subjects.
- Click “Save”.
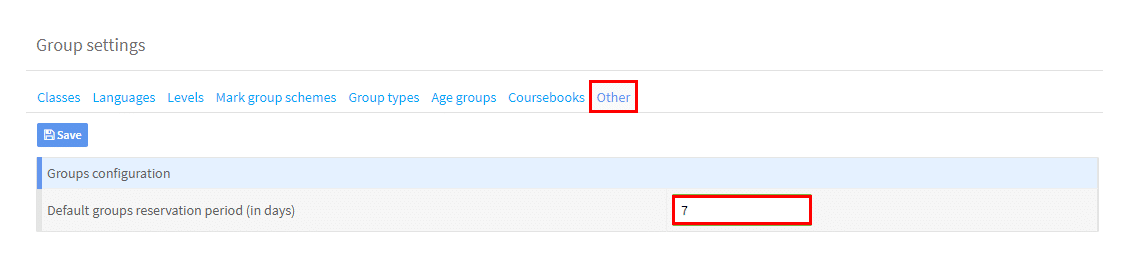
Other:
This item is for use if you allow students to reserve places on courses before actually enrolling/paying. This setting works in conjunction with another setting. If in Settings – Basic Settings – System Configuration – Group Management the following item is ticked:
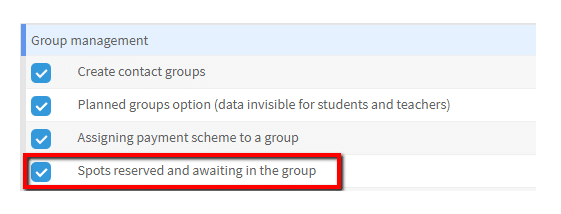
Then when you add students to a group they will automatically be placed into the Reserved Section here:
- Enrolled section.
- Reserved section – once that date has passed the student will be highlighted in red.
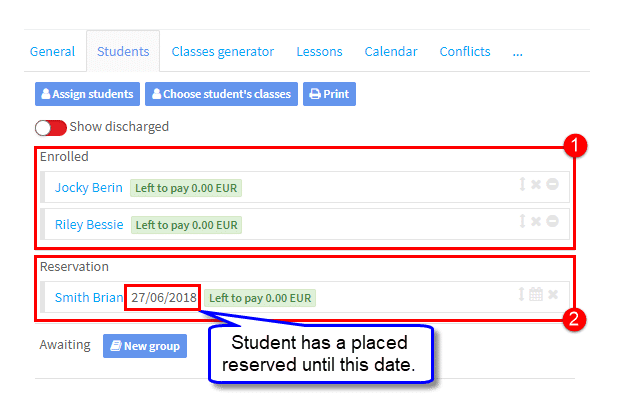
The number of days for the reservation period is as set here.