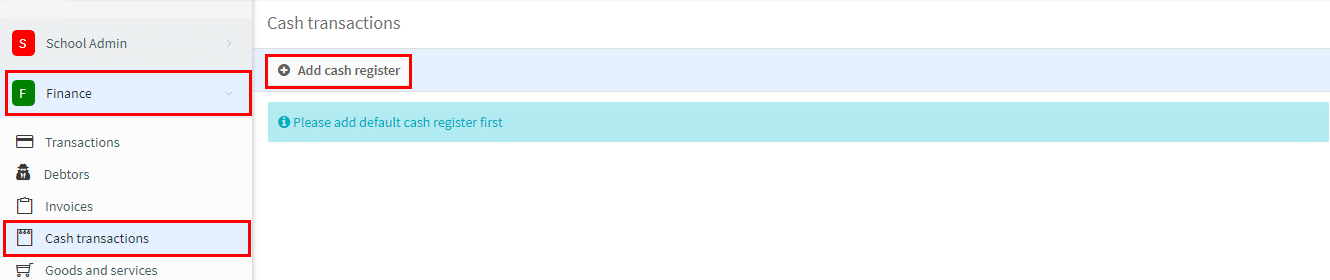
Creating the Cash Register:
Before you can begin to use the Finance Module there are a number of things you must set up first. One of them is the Cash Register. This will be used to monitor the cash that moves in and out of your school.
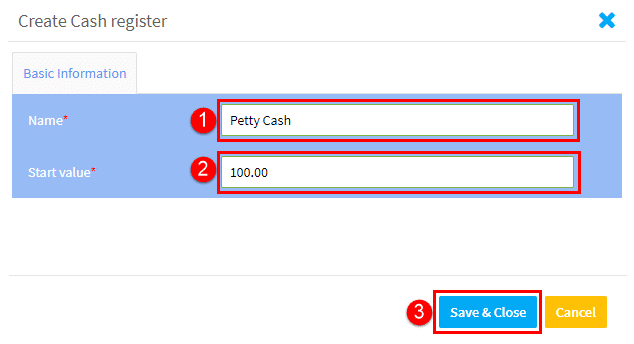
- Click “Add cash register”.
- Name the register.
- Put the opening cash balance.
- Click “Save & Close”.
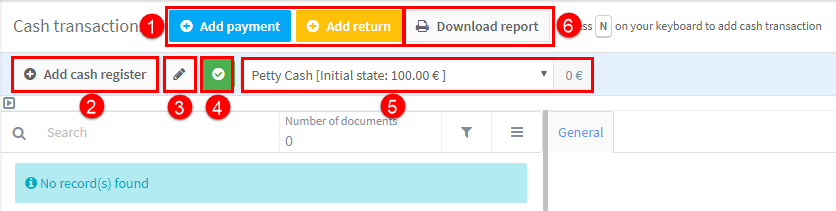
Now your cash register will appear:
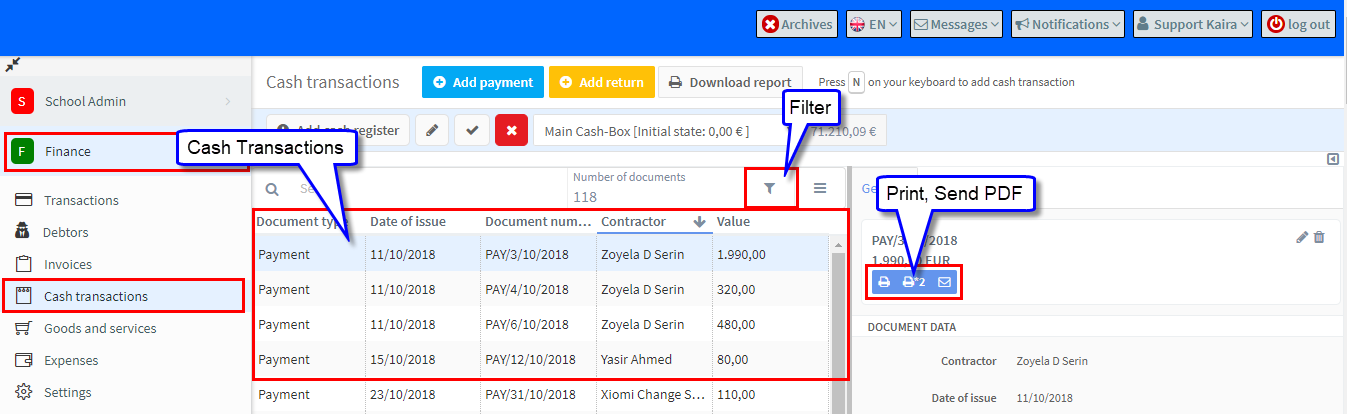
- This is where we record transactions (See Adding Numberings below).
- You can add extra cash registers for other staff.
- Edit the cash register.
- The green shows we are using the default cash register (in cases where you have more than one).
- Cash register balance.
- Download report (See below).
Adding Numberings:
Before we can Add Payments or Returns we need to create numbering systems for these items. If you try to create an item without having done so, you will see this message:

Clicking on this button will take you to Finance Module – Settings – Numberings
The two specific settings that Cash Transactions uses are:
- Document type – Payment, for adding cash payments to the cash register from students etc.,
- Document type – Return, for paying cash payments from the cash register to students etc.,
Once these are added you can cash transactions to your school’s account and print documents etc.,
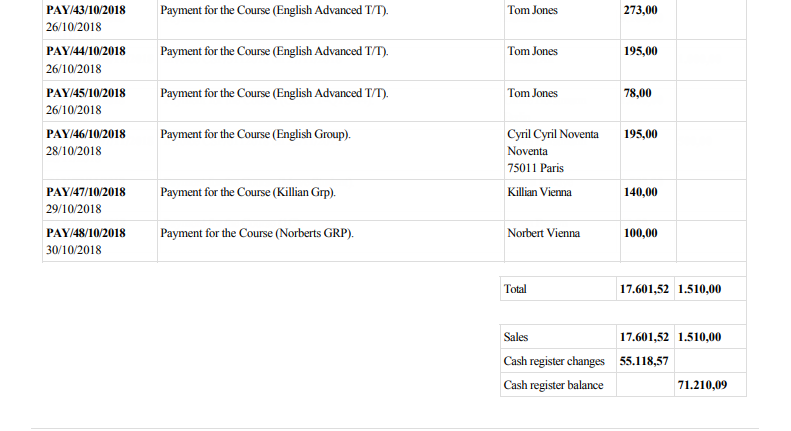
Cash Register Report:
To get a report on all your cash transactions click “Download Report”

Enter the dates you require the report for in the window that appears and click “Print”:

And the report will appear detailing each transaction and total of all income and expenditure in the period: